Find answers for your questions

Campaign Builder

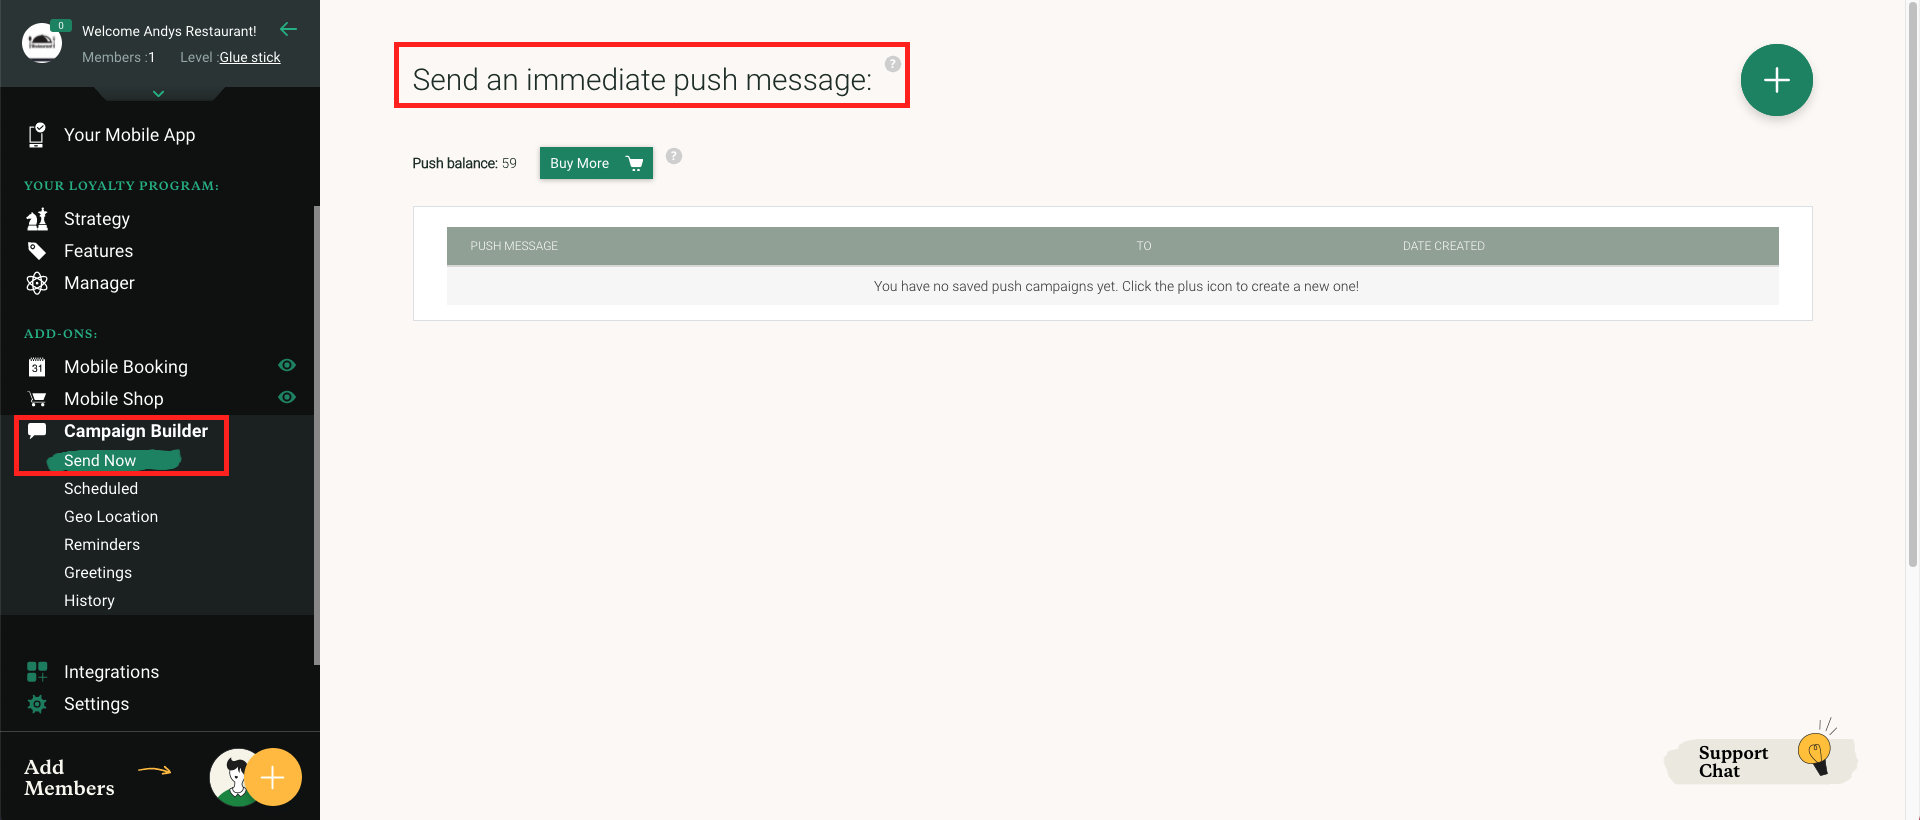
Once your App is published to the Apple and Google Play stores, Glue’s easy-to-use push notifications feature, allows you to; create, schedule, and send push messages. Capture clients’ attention and keep them engaged with updates, incentives, reminders, and promotions.

Send relevant notifications to all users, or send personalised offers to a specific group of clients, based on their purchase behaviour, interests and more.

*Please contact support for details on how to upgrade your plan to include this feature*


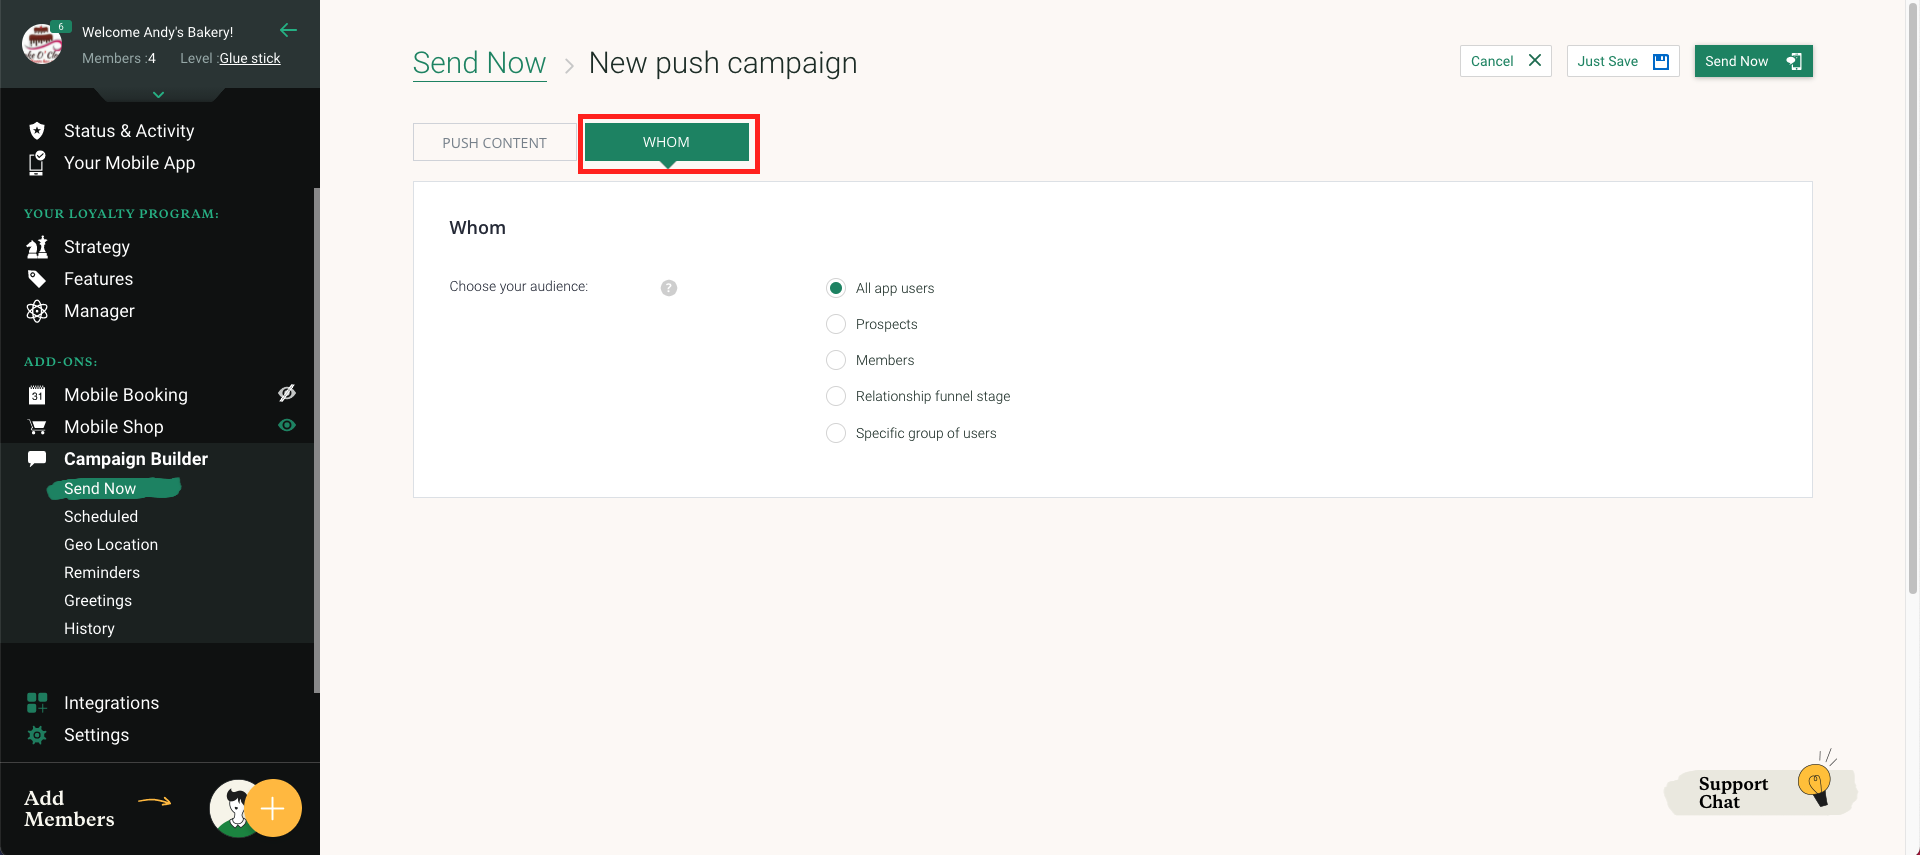
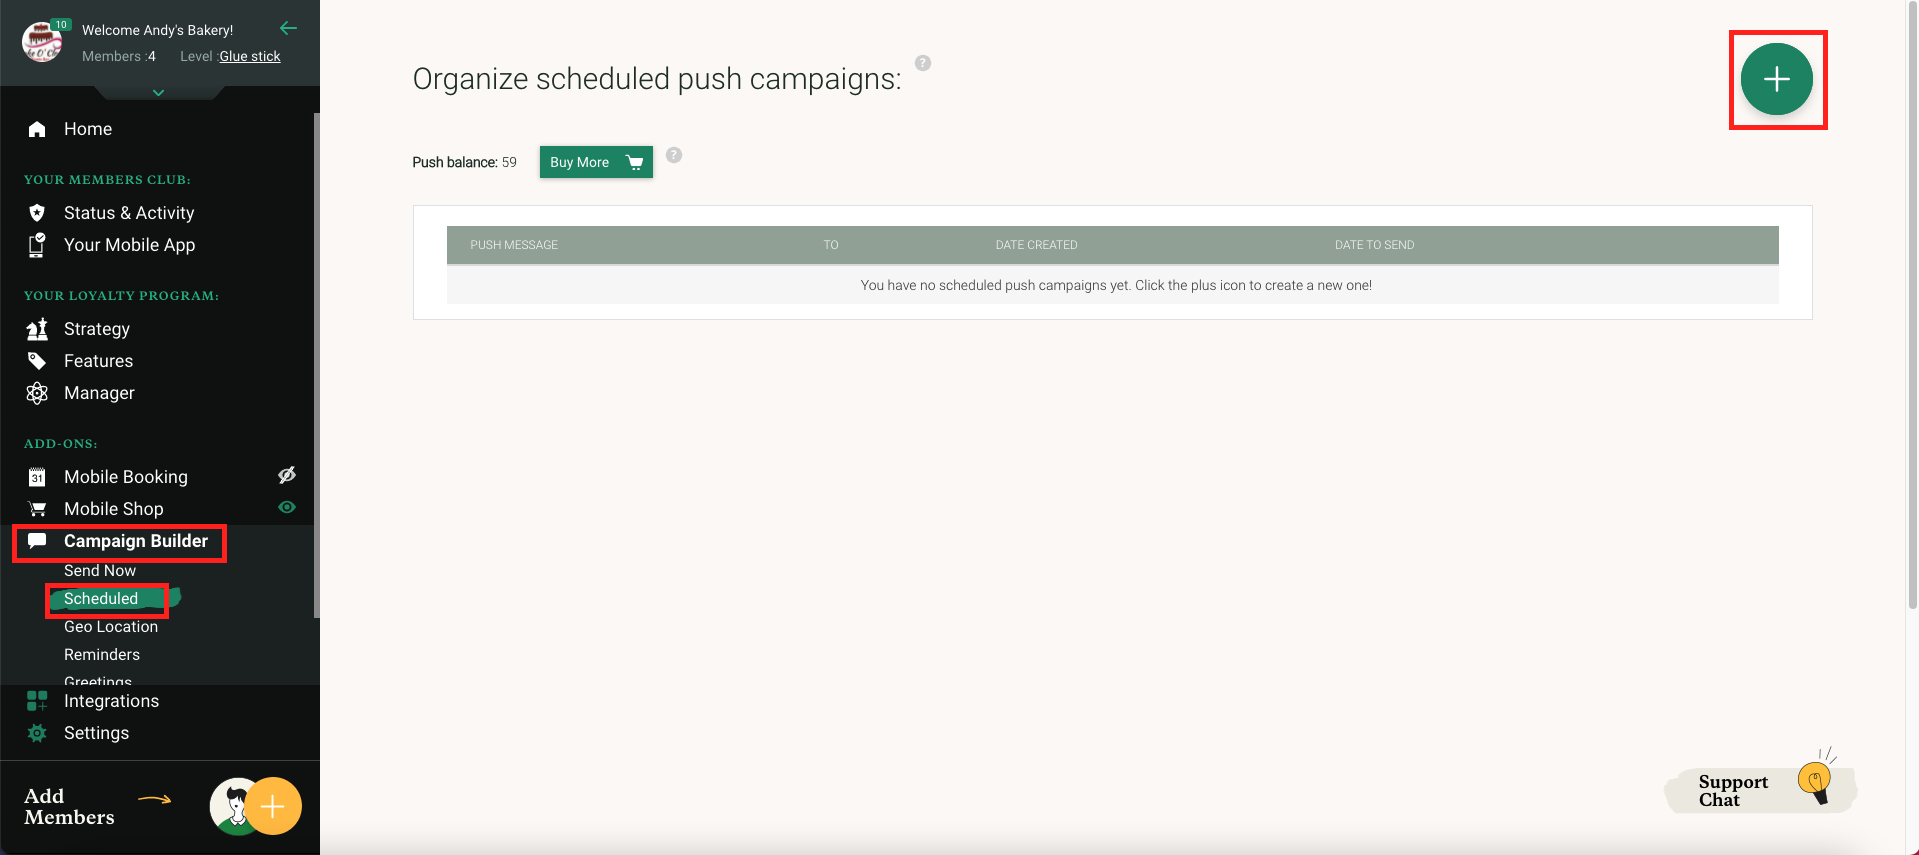
Push Campaign Options:

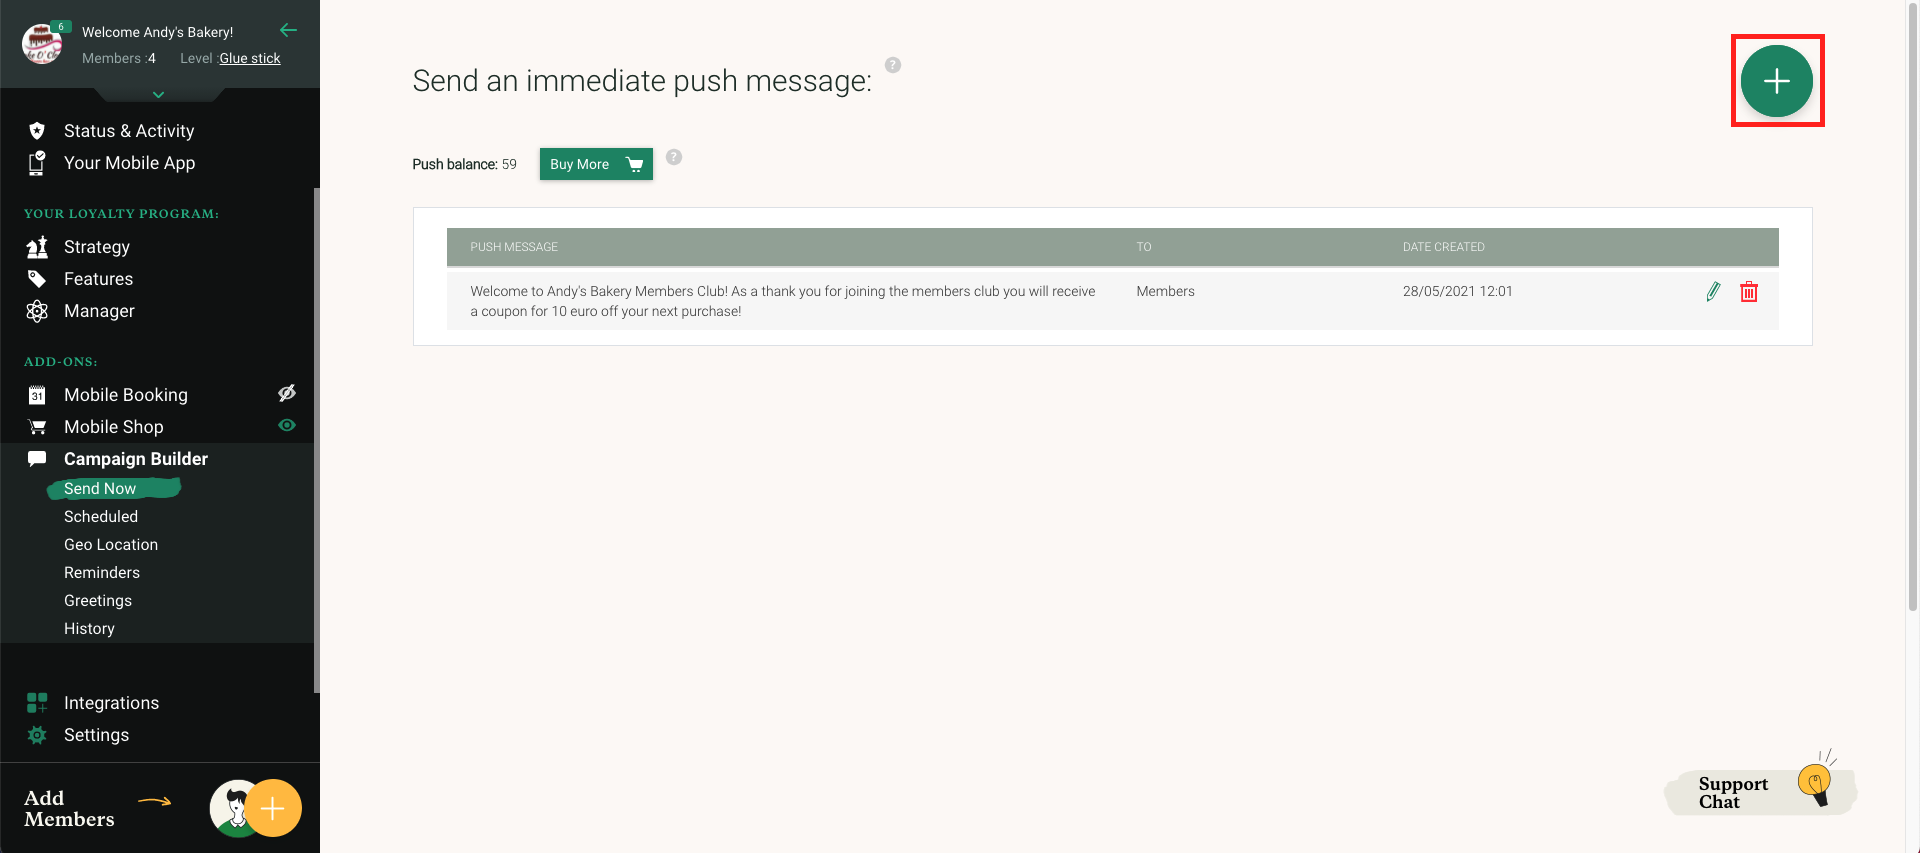
  • Send Now – Send an immediate push message to your clients, or save it for later
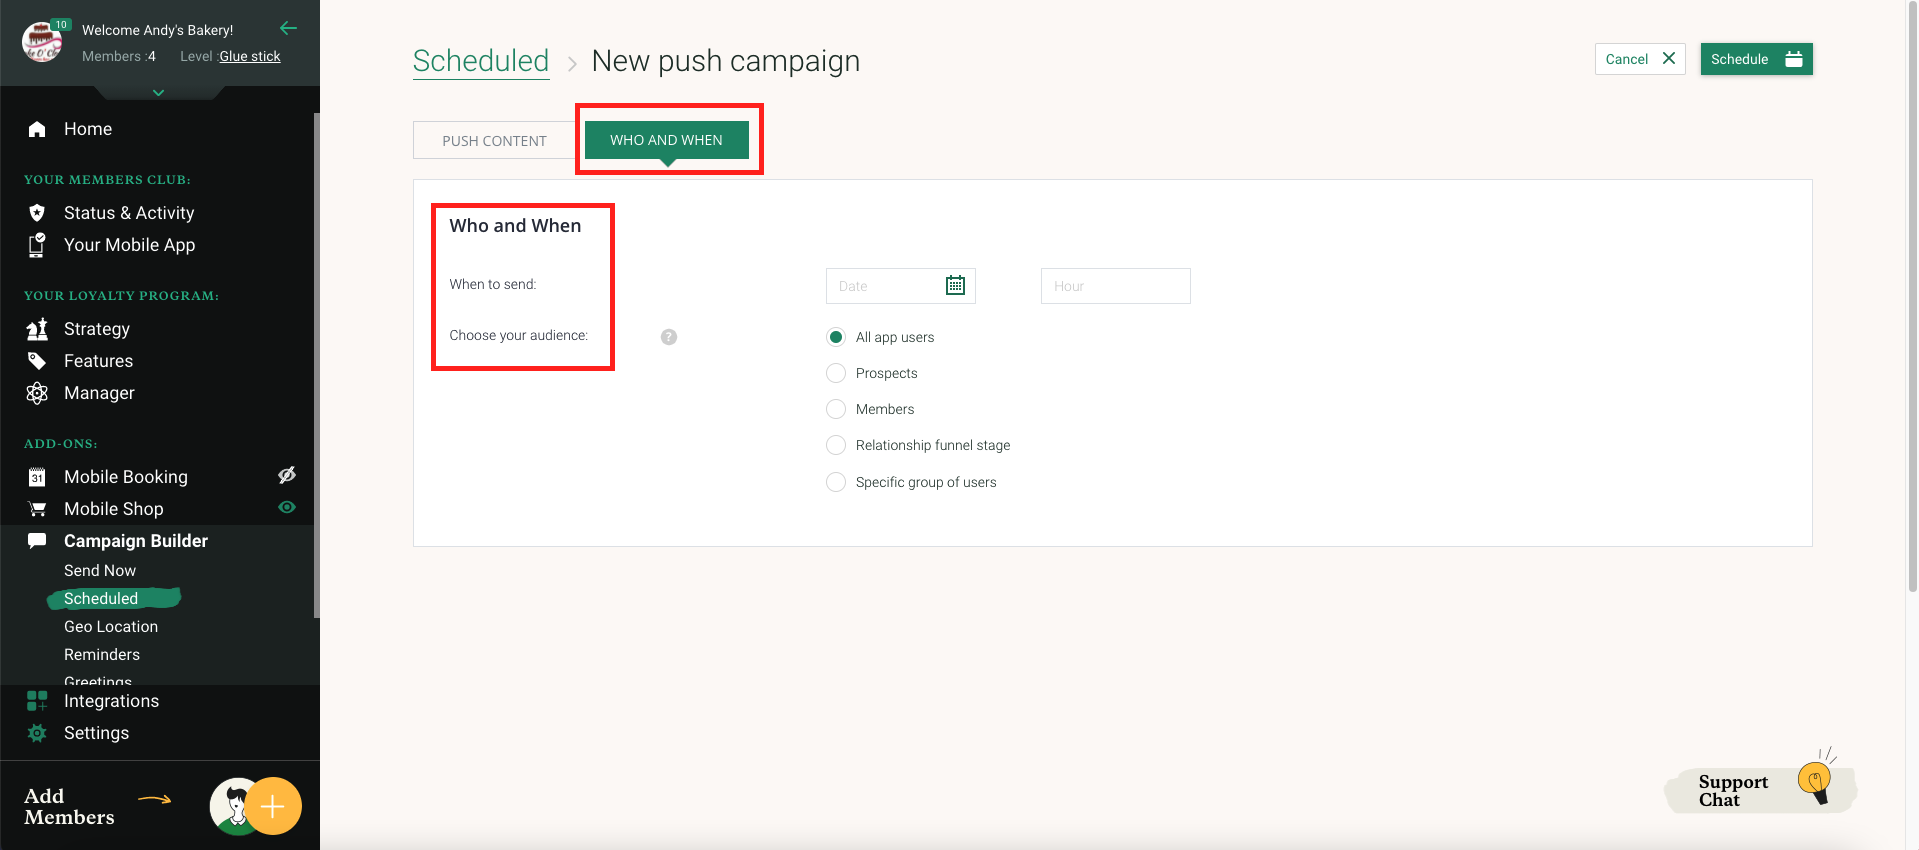
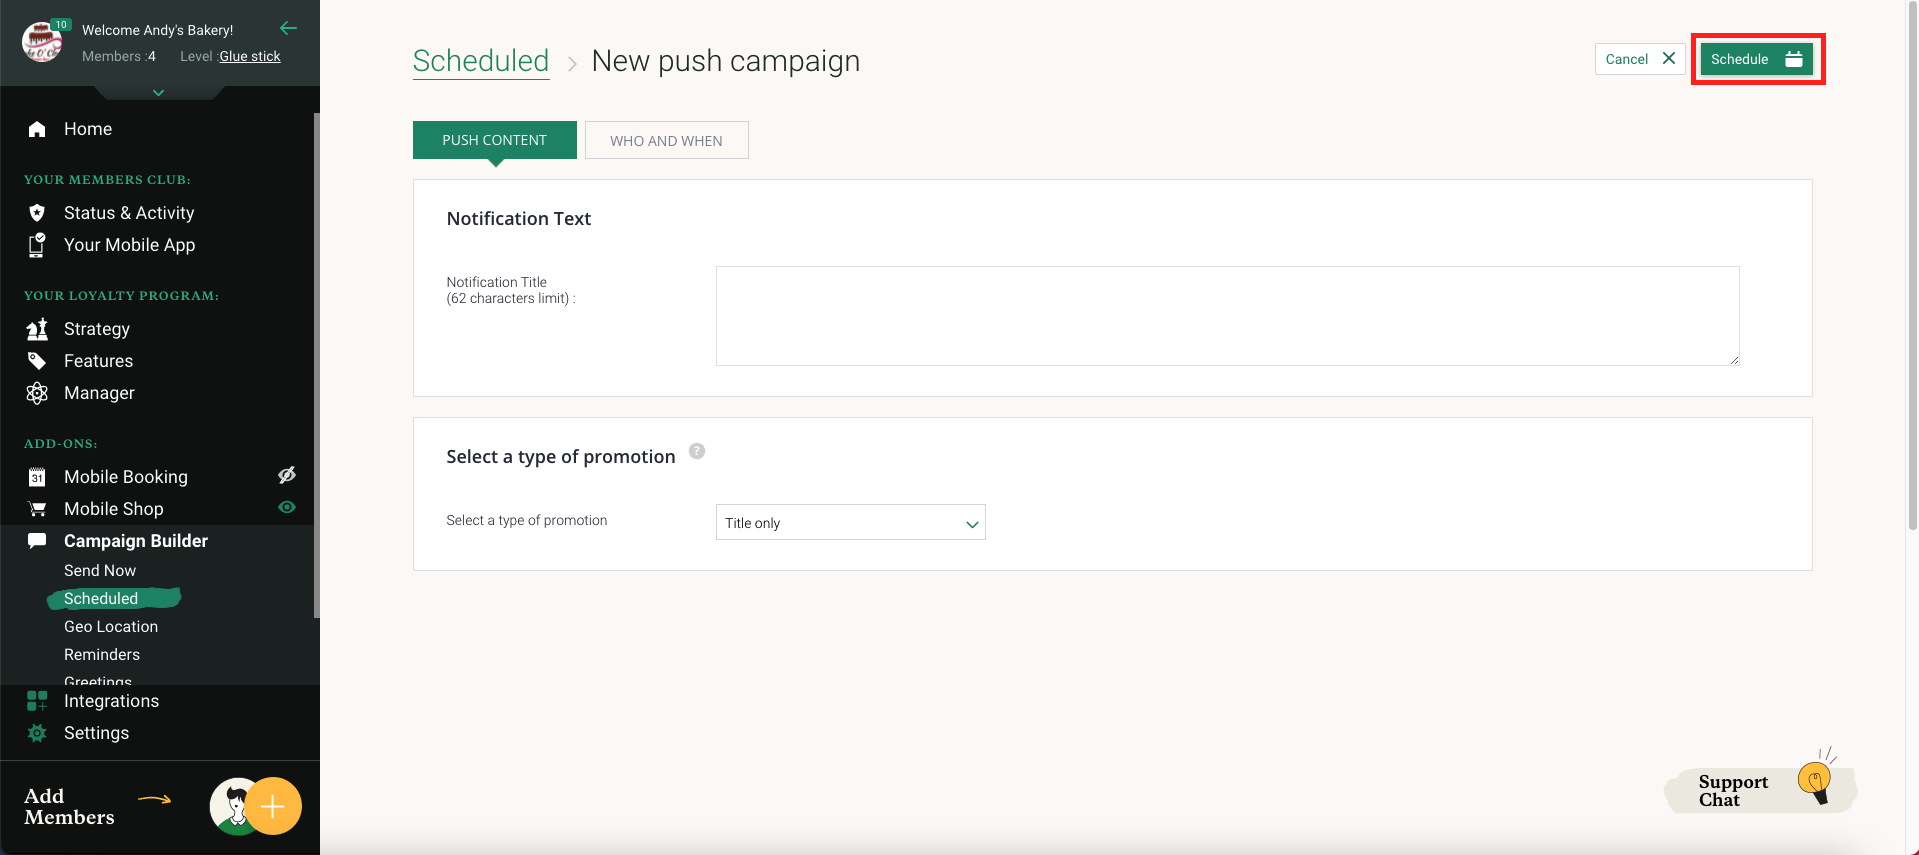
  • Scheduled– Send immediately or schedule in advance.
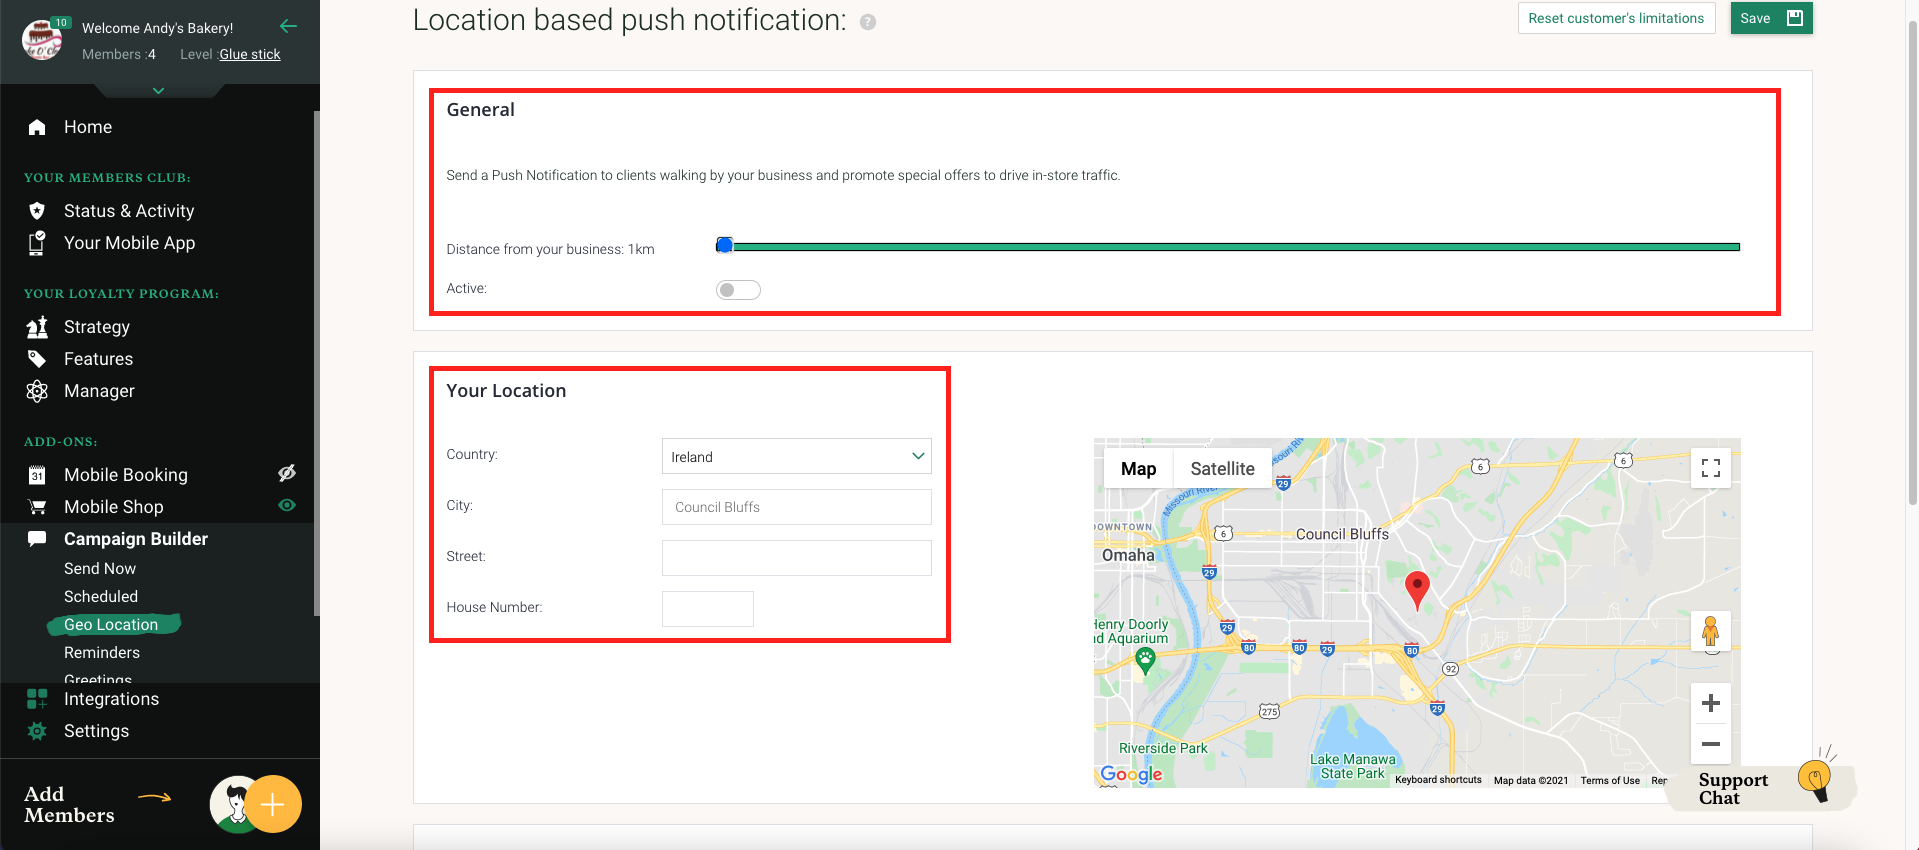
  • Geo Location – Trigger a push notification to users who are located close to your business location.
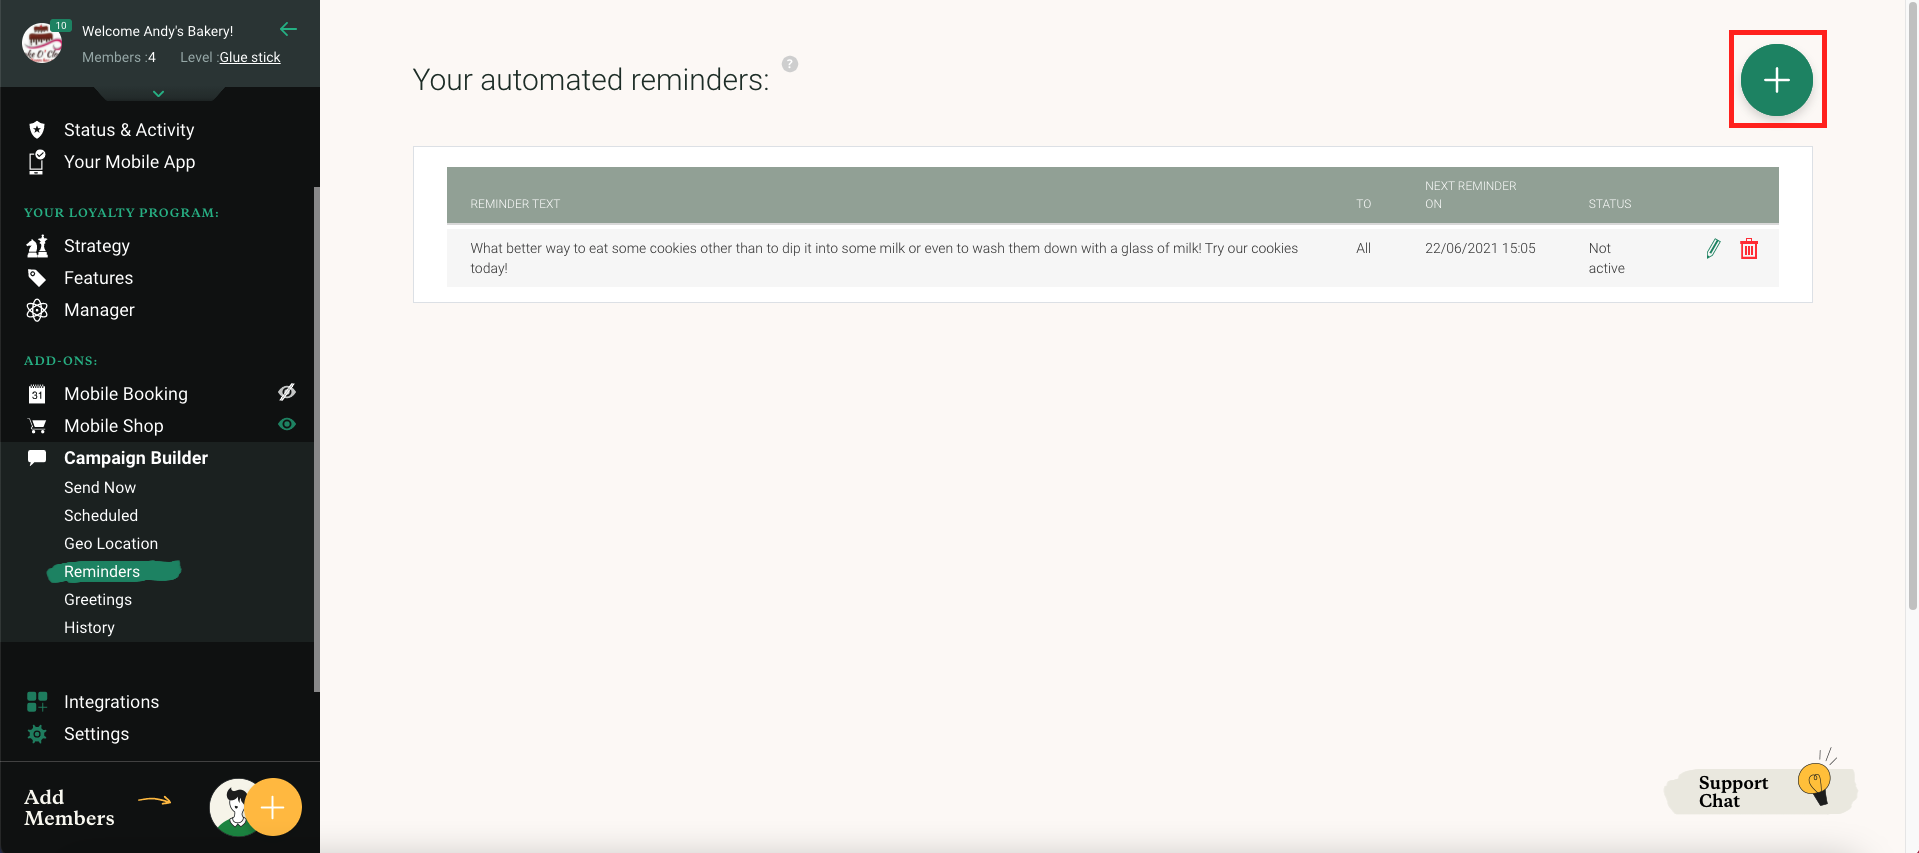
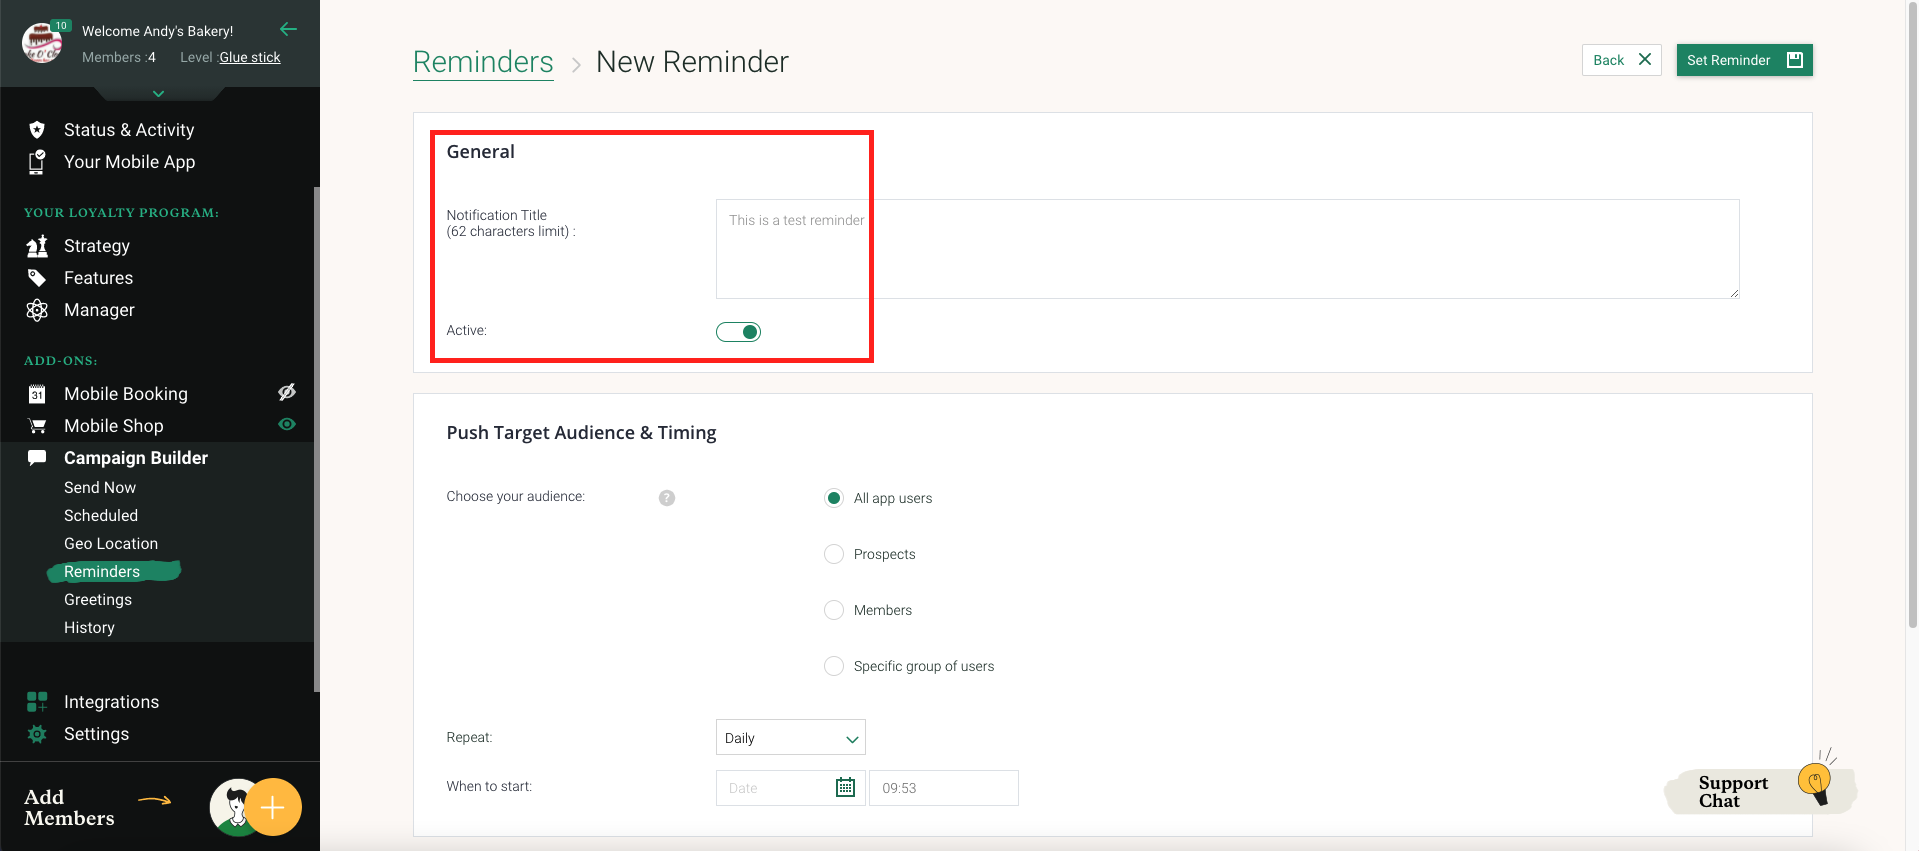
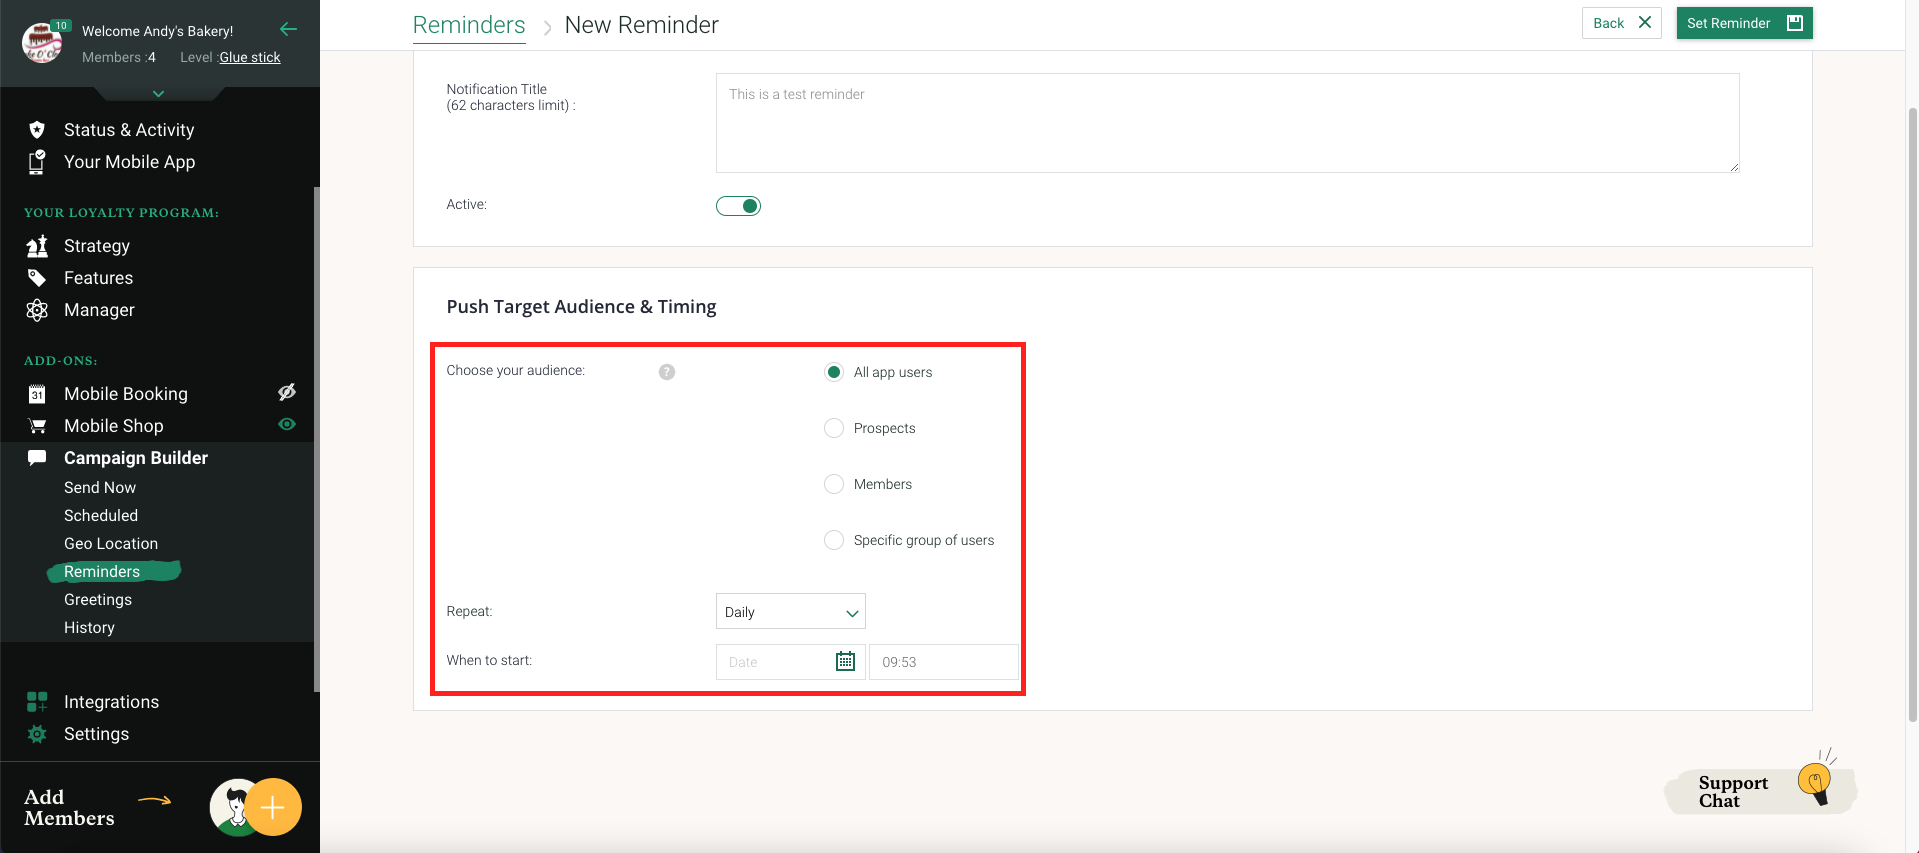
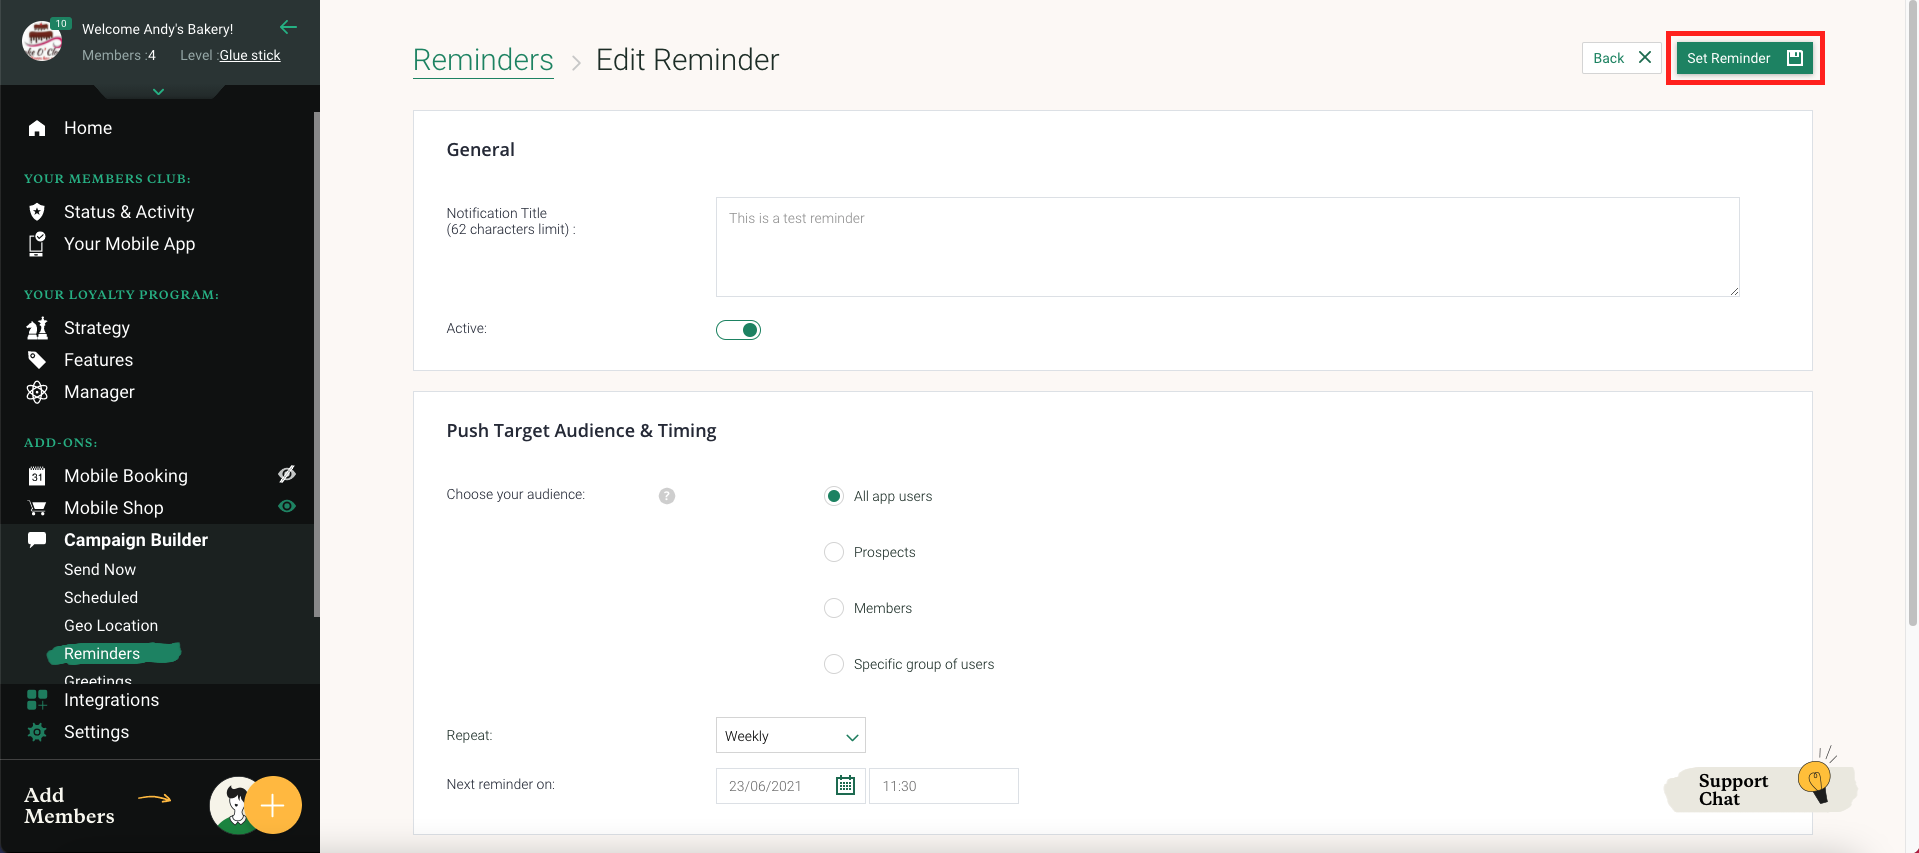
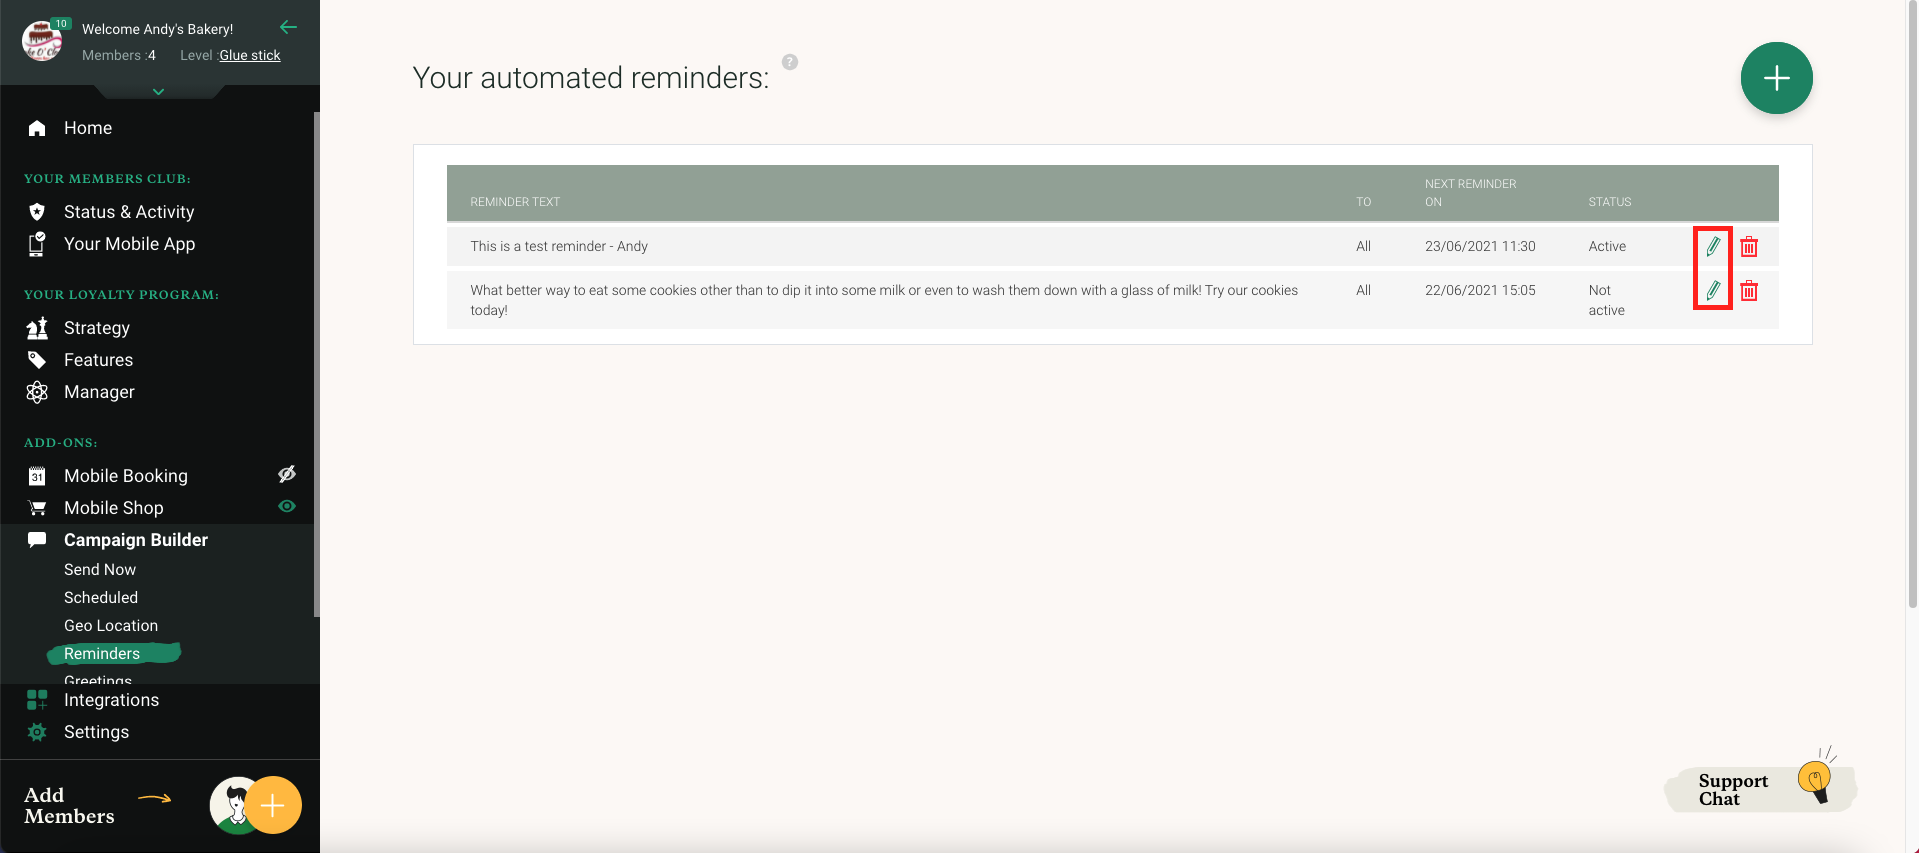
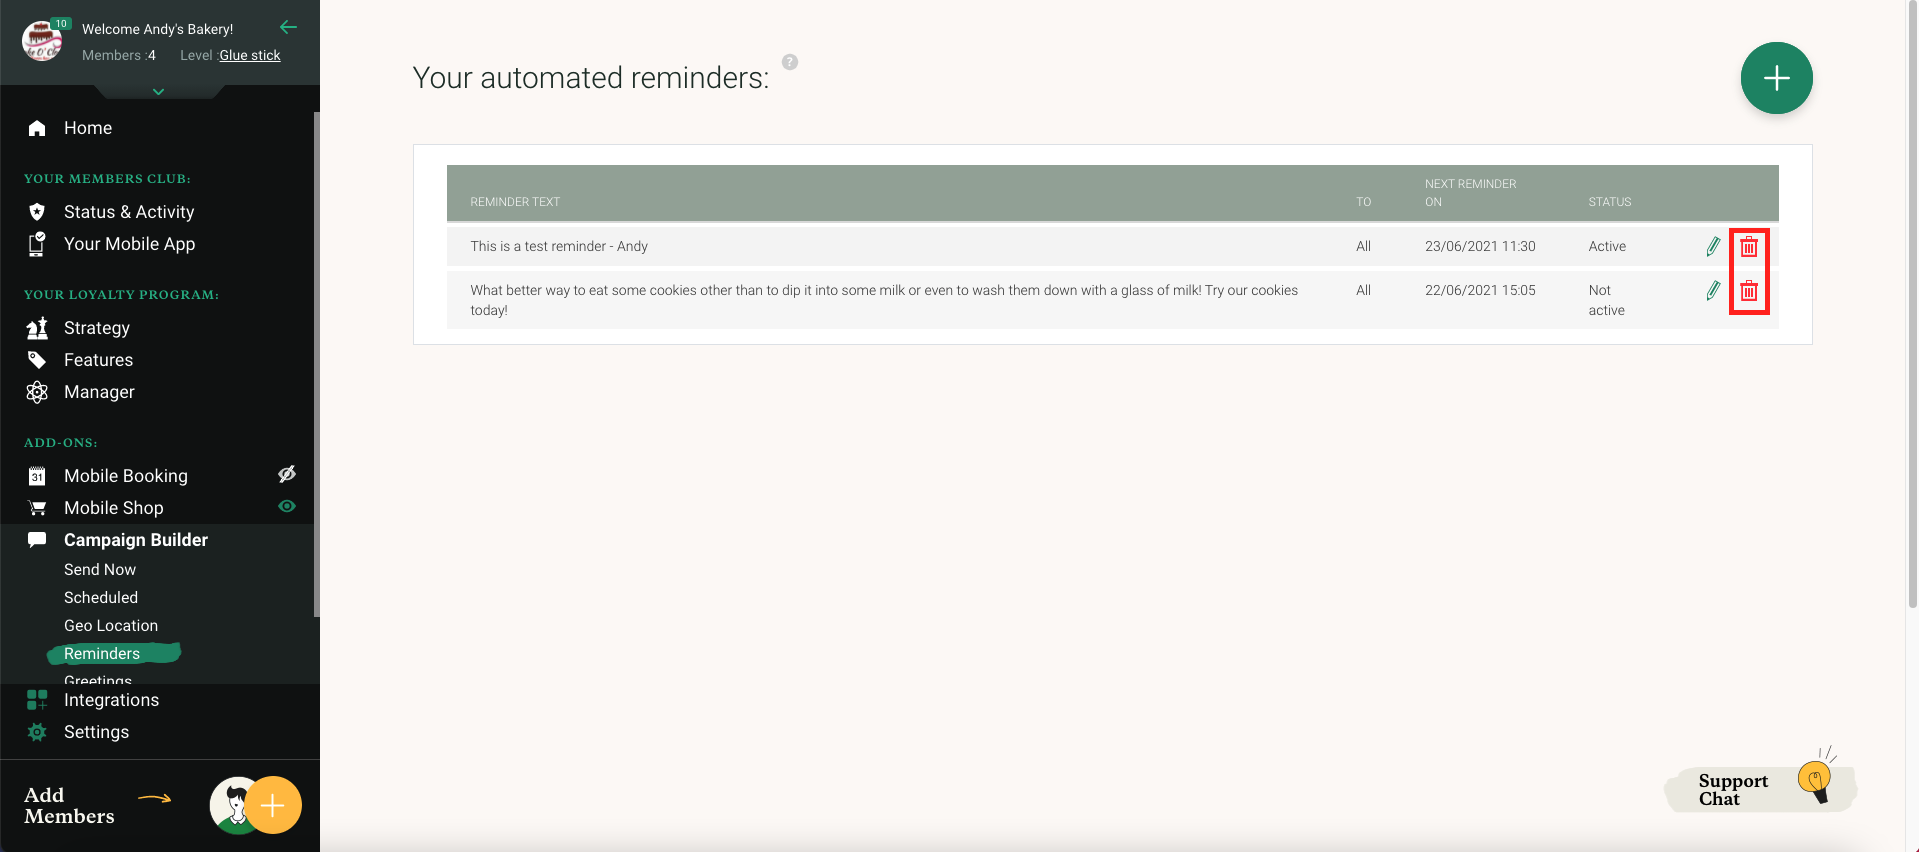
  • Reminders – Customise reminders and set default times to send daily, weekly, monthly, or annually.
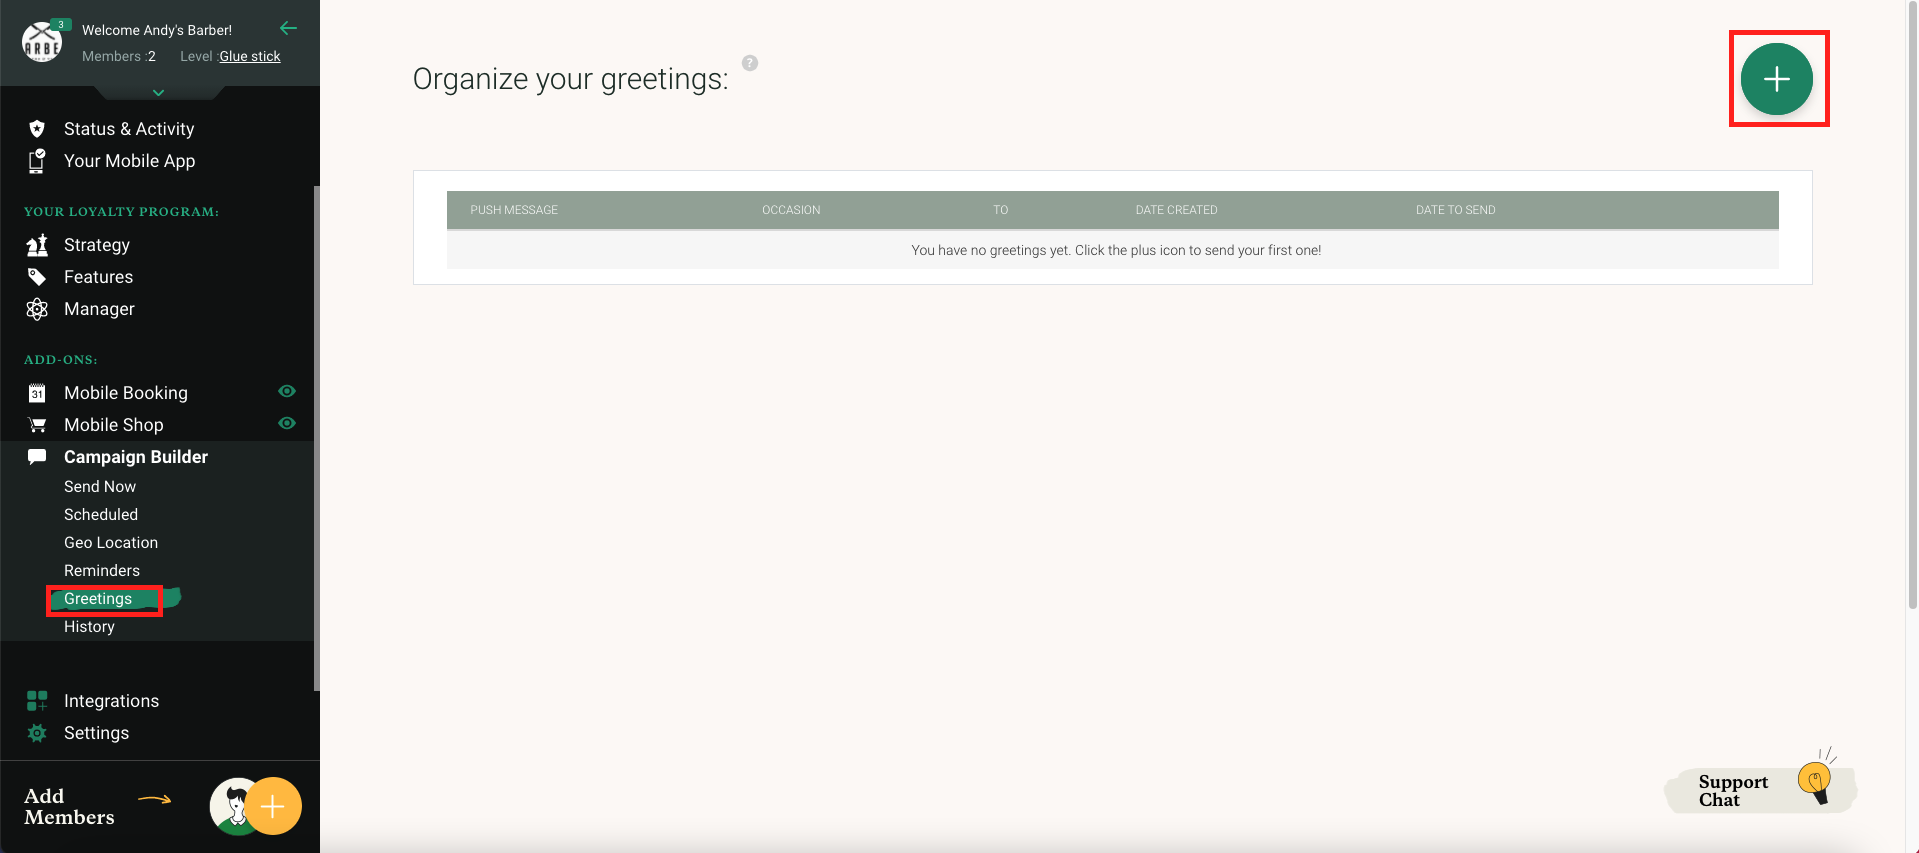
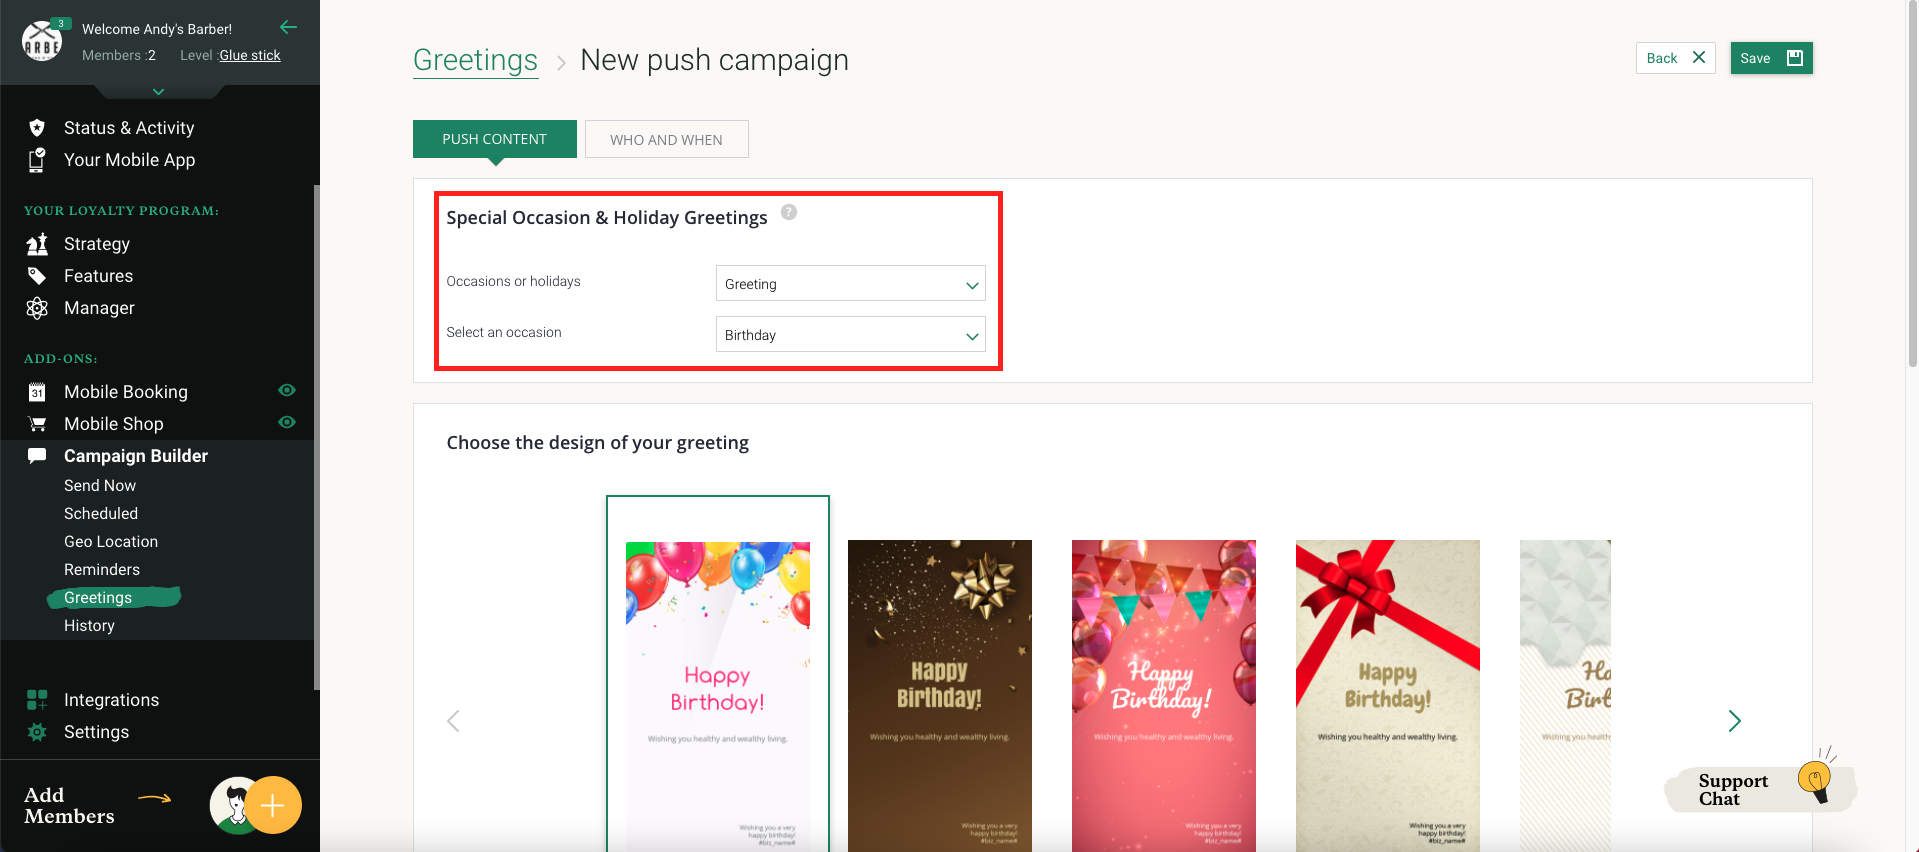
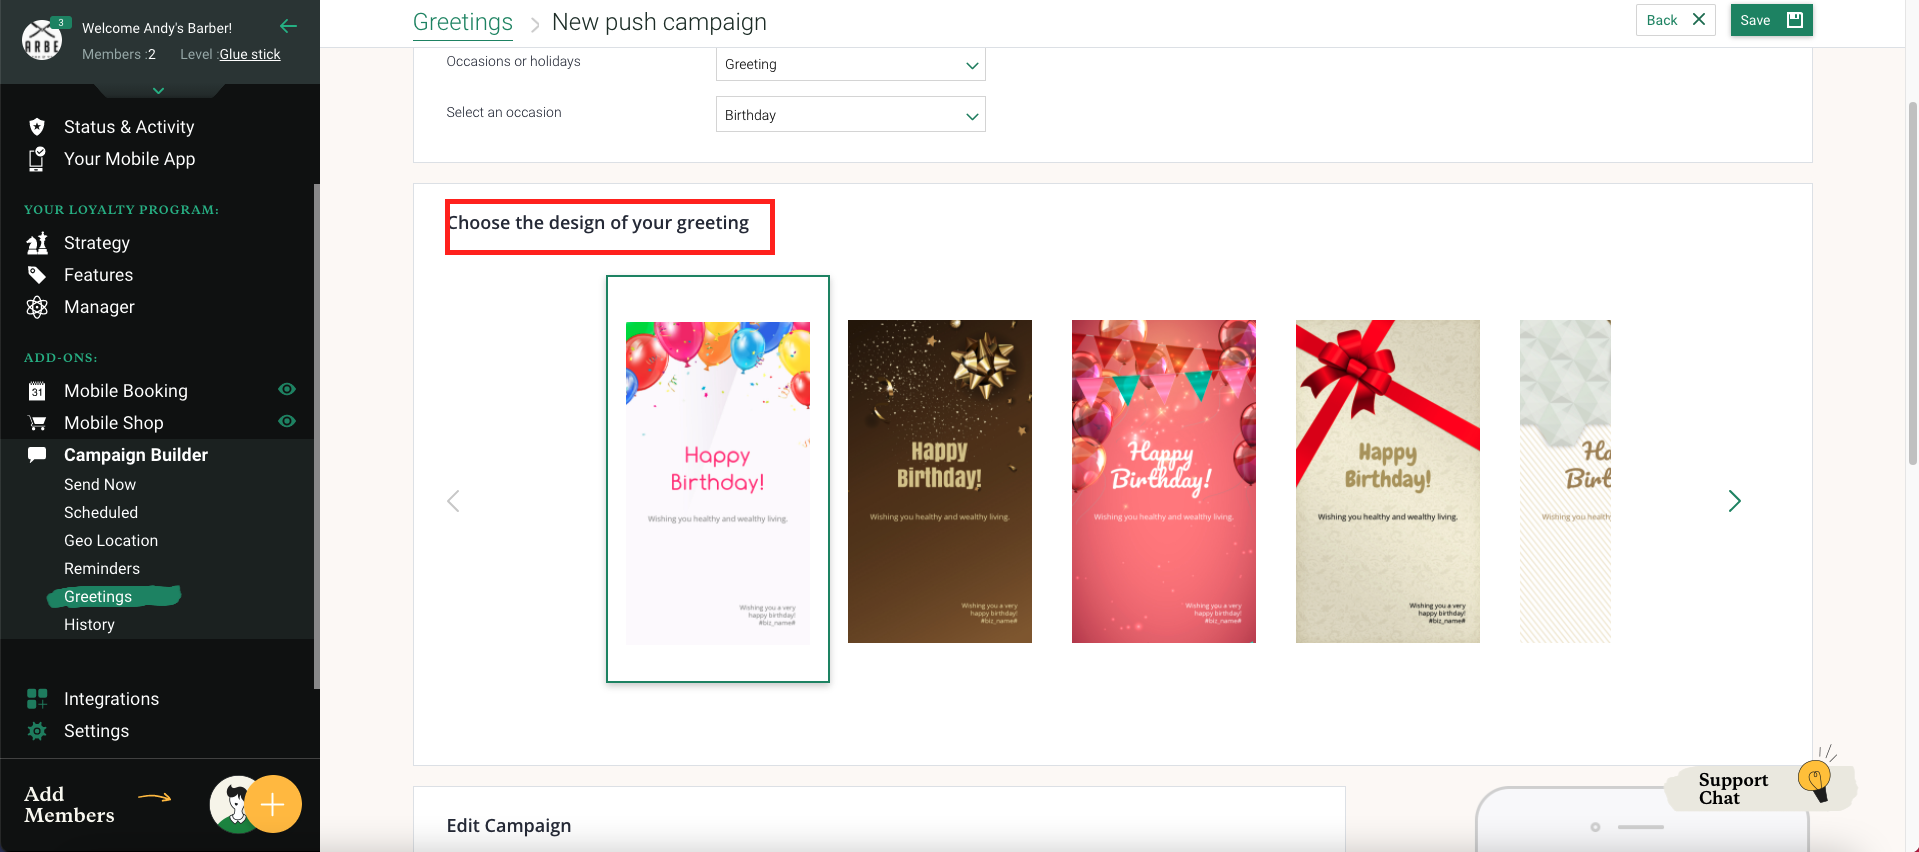
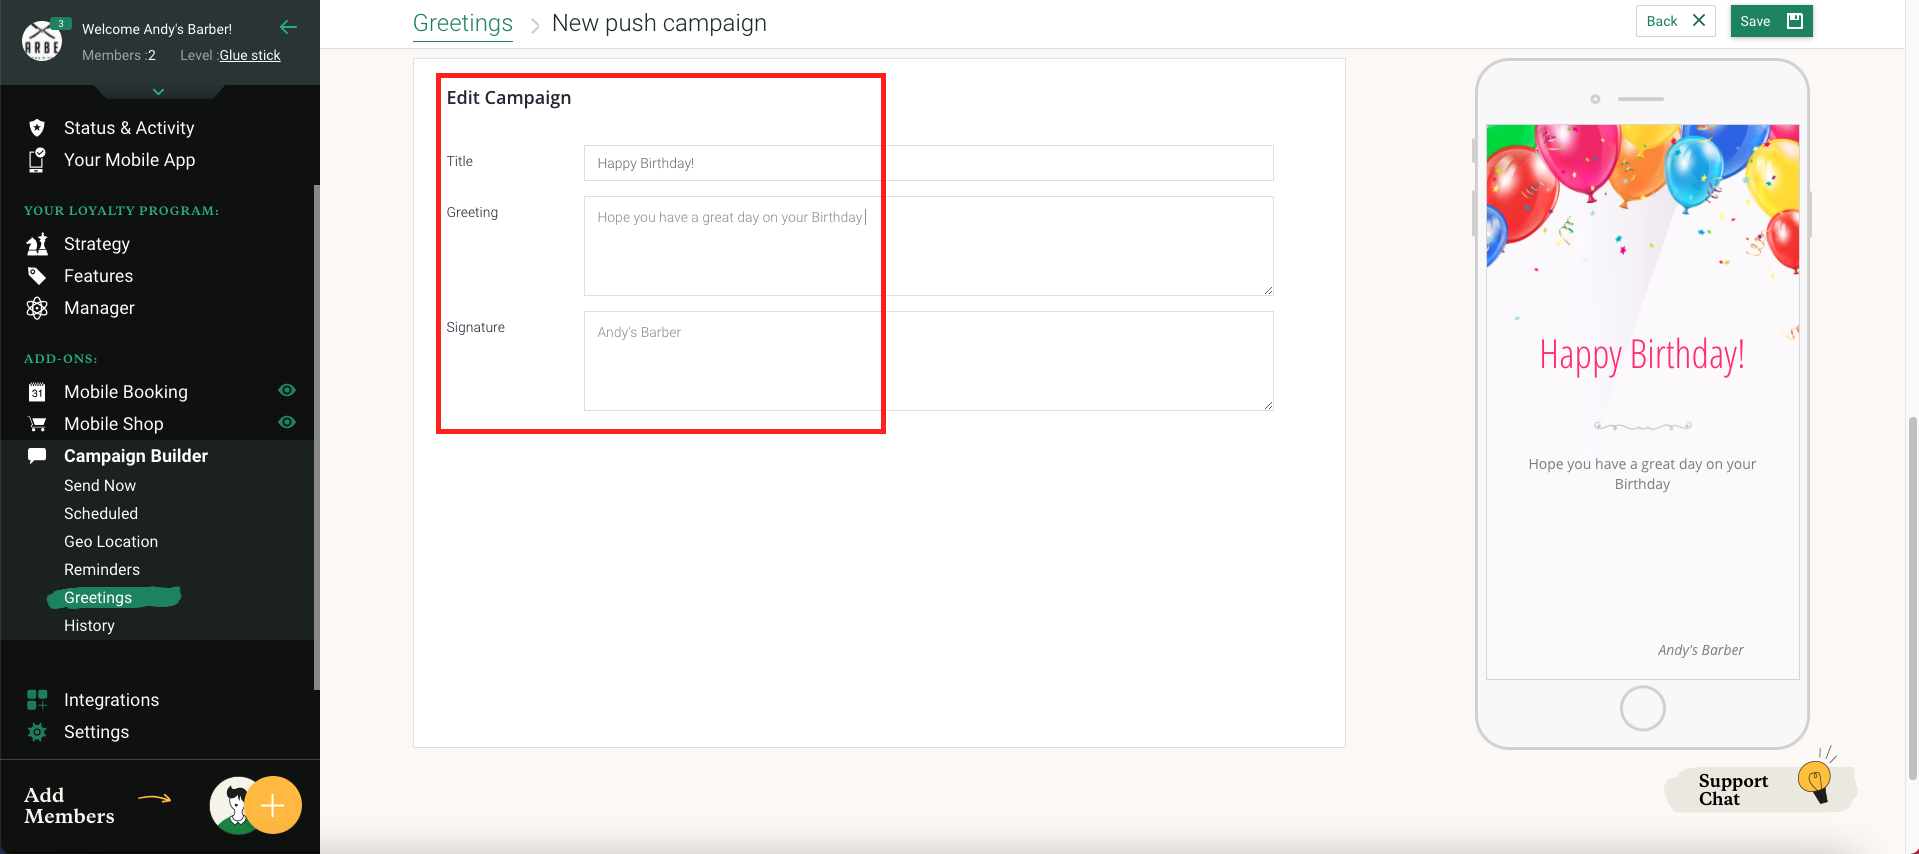
  • Greetings – Send personal messages to engage clients on special occasions and holidays.
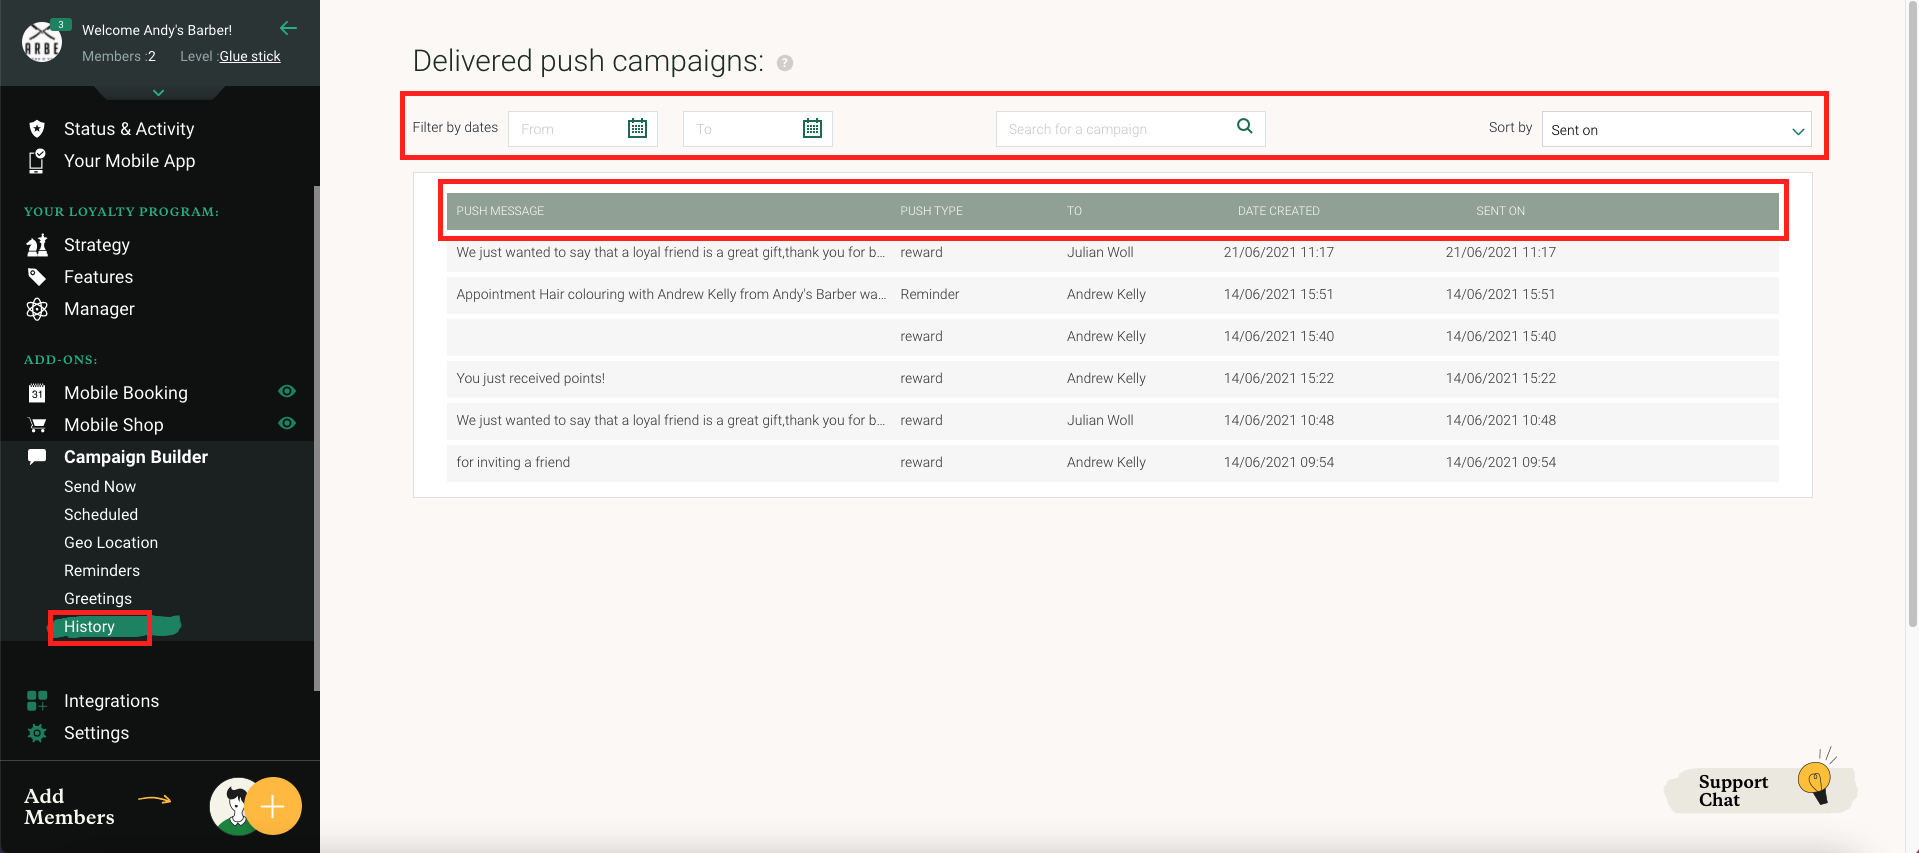
  • History -Here you can see the history of push messages sent by you to your app users.

Scheduled

Send clients updates about your business, announce new products, greet them on holidays, and more. Create push notifications to be sent immediately or scheduled in advance.


Geo Location

Tailor notifications and send them at the right time and place. Use marketing personalisation and boost your in-store traffic by sending push notifications to users who are located within the radius of your business location.


Reminders

Set default times to send daily/weekly/monthly/annually customised reminders once clients book appointments. Whether you want to remind a trainee to drink water, or that it’s time for their routine checkup, push notification reminders is the best method to do so.


Greetings

Send personalised offers to clients and engage them on their birthday, holidays, and other special occasions. Show your clients you care by sharing holiday sales, exclusive deals, and special events to build up excitement.


History

Here you can see the history of push messages sent by you to your app users. Click the copy icon to duplicate a campaign, or see its insights.


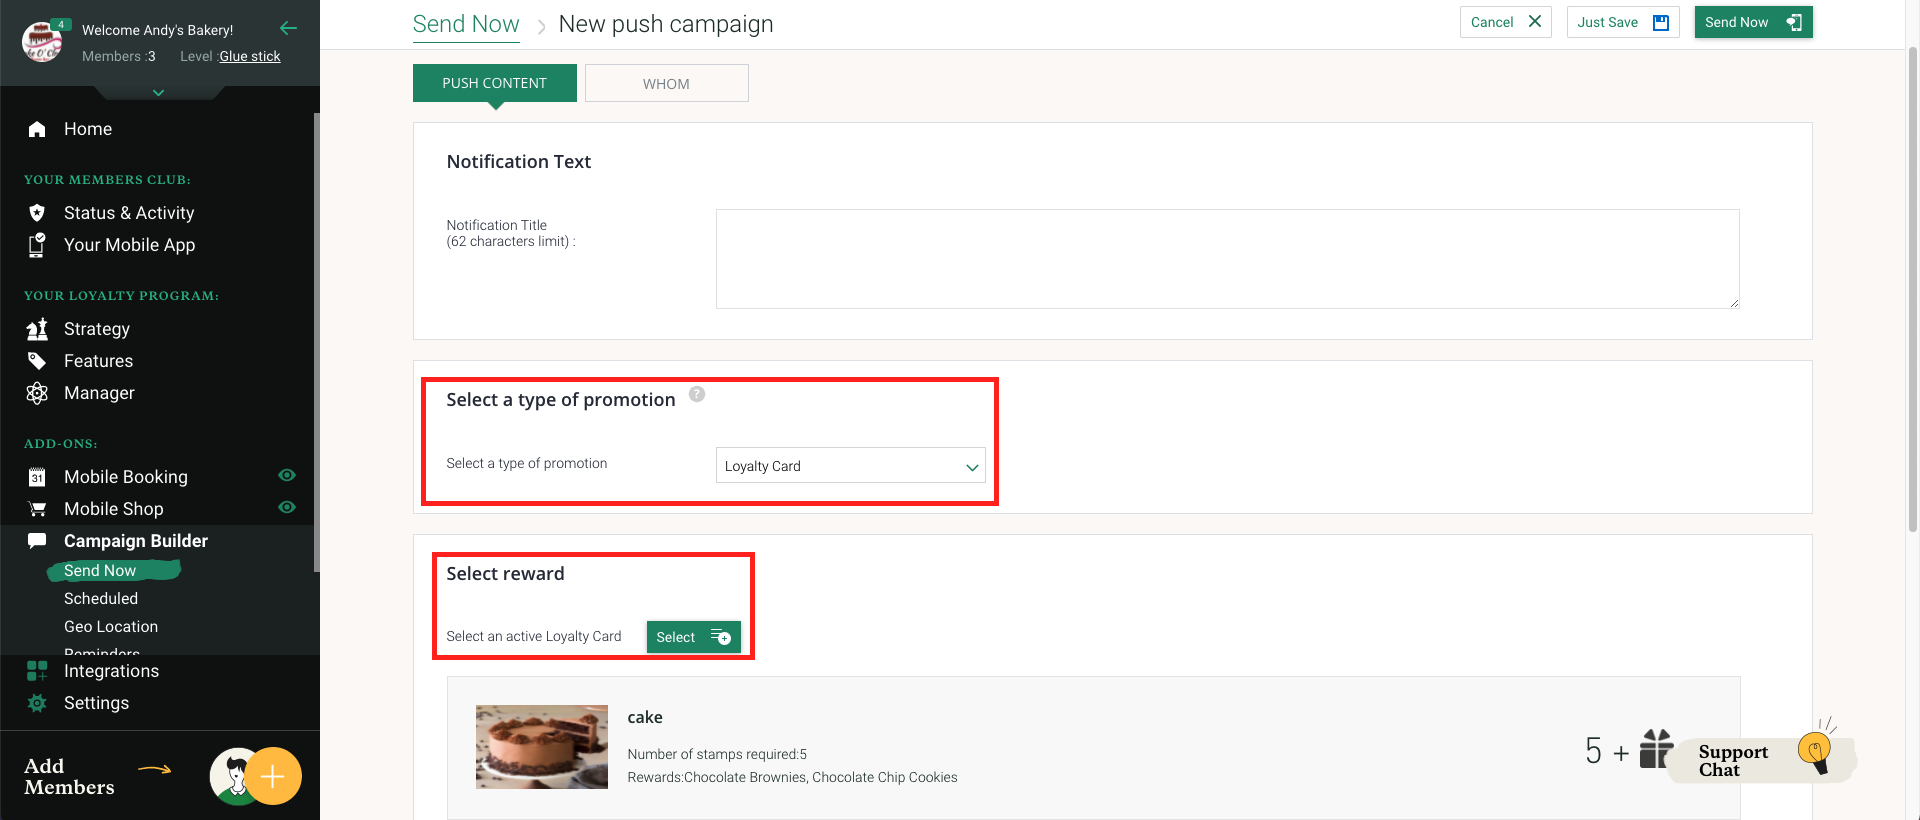
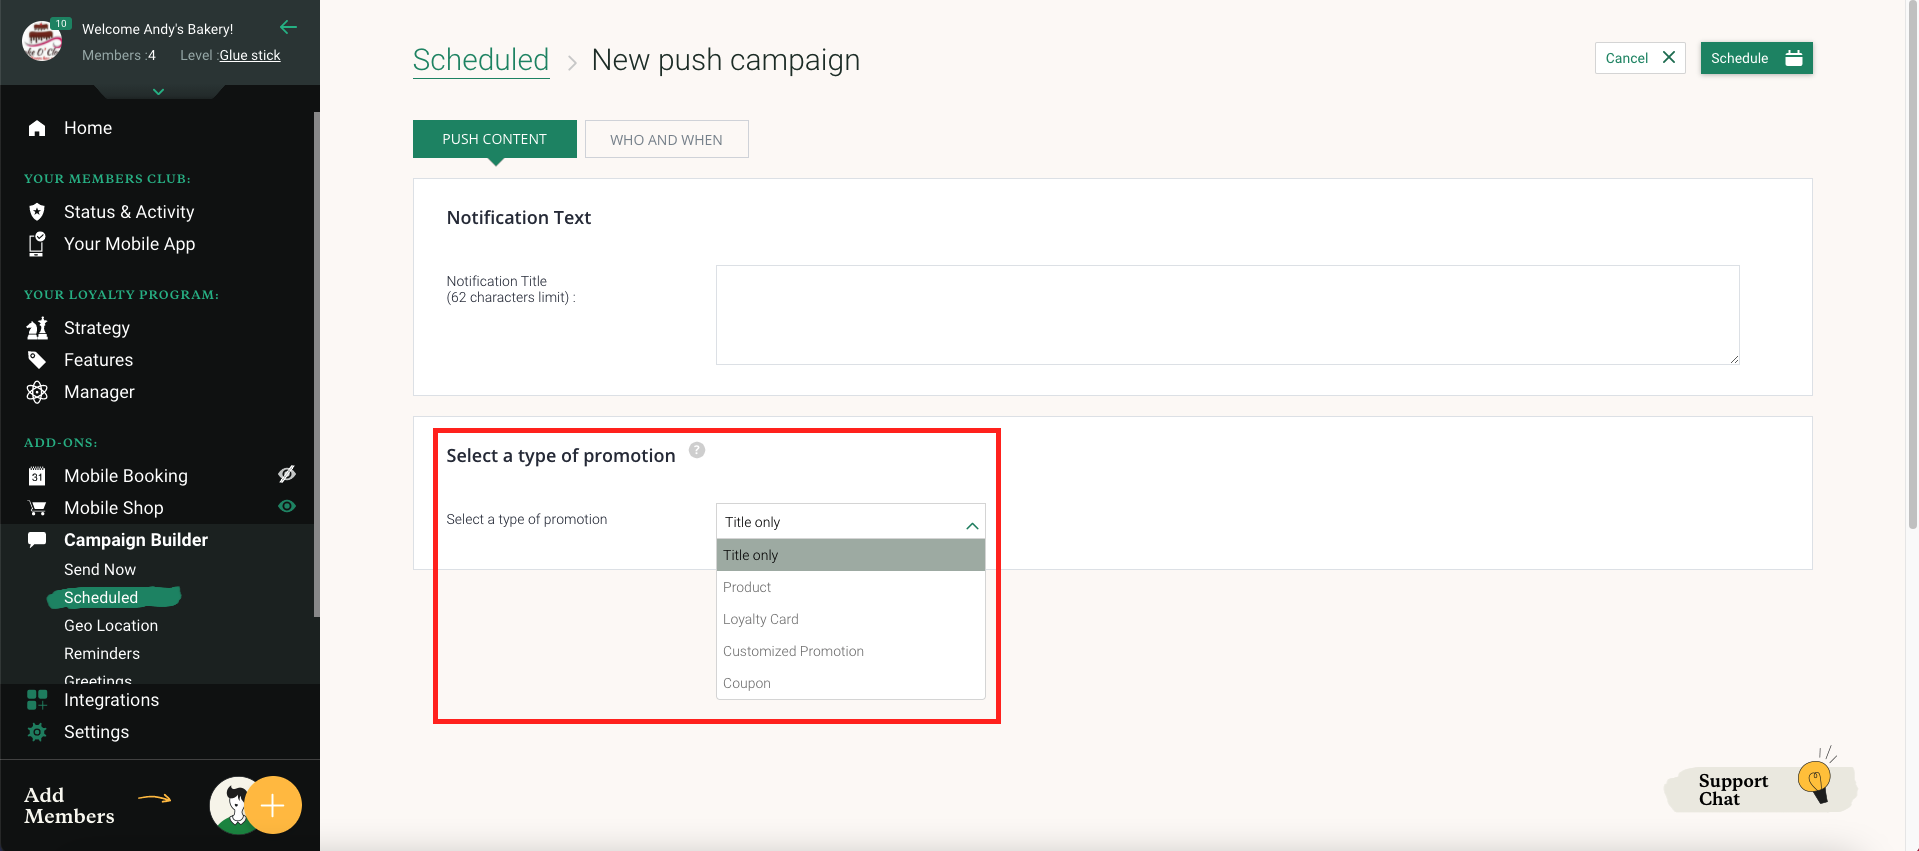
Promote your new feature such as a Loyalty Card using Push Notifications


Once you created a loyalty card, we recommend for you to inform your clients about it with a simple push notification.

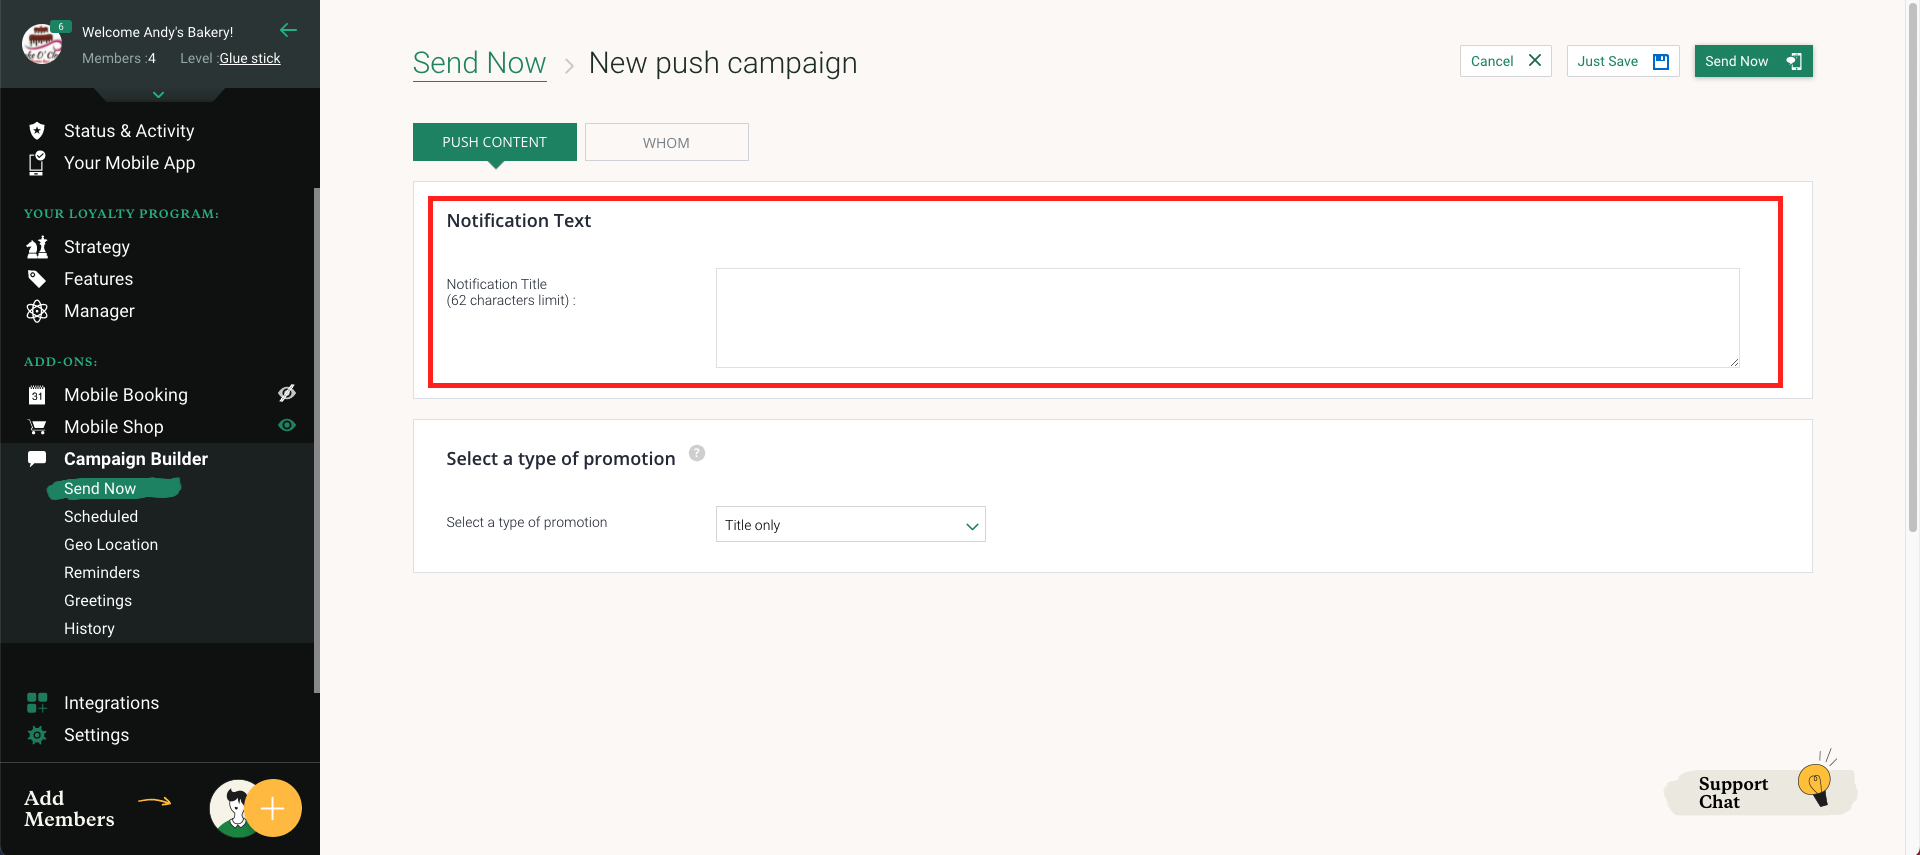
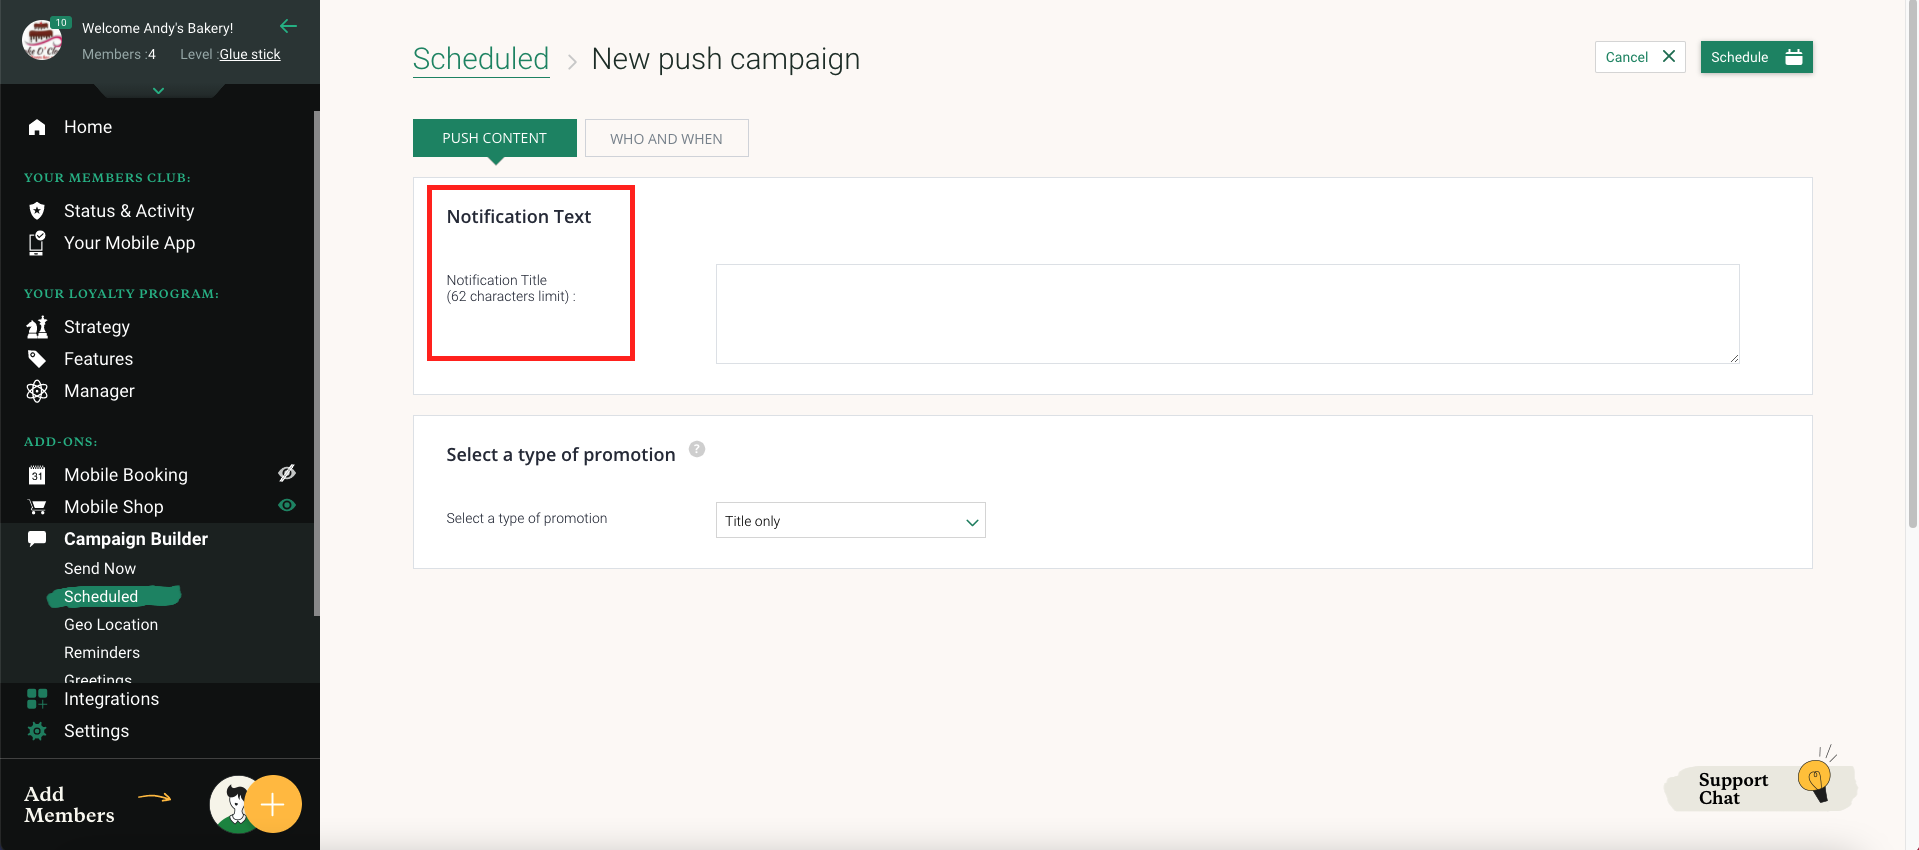
Go to the Push Notifications section on the left main menu and choose whether to send it in another time (the Schedule tab) or to send it now (Send Now tab). To create a new push campaign click the plus icon.

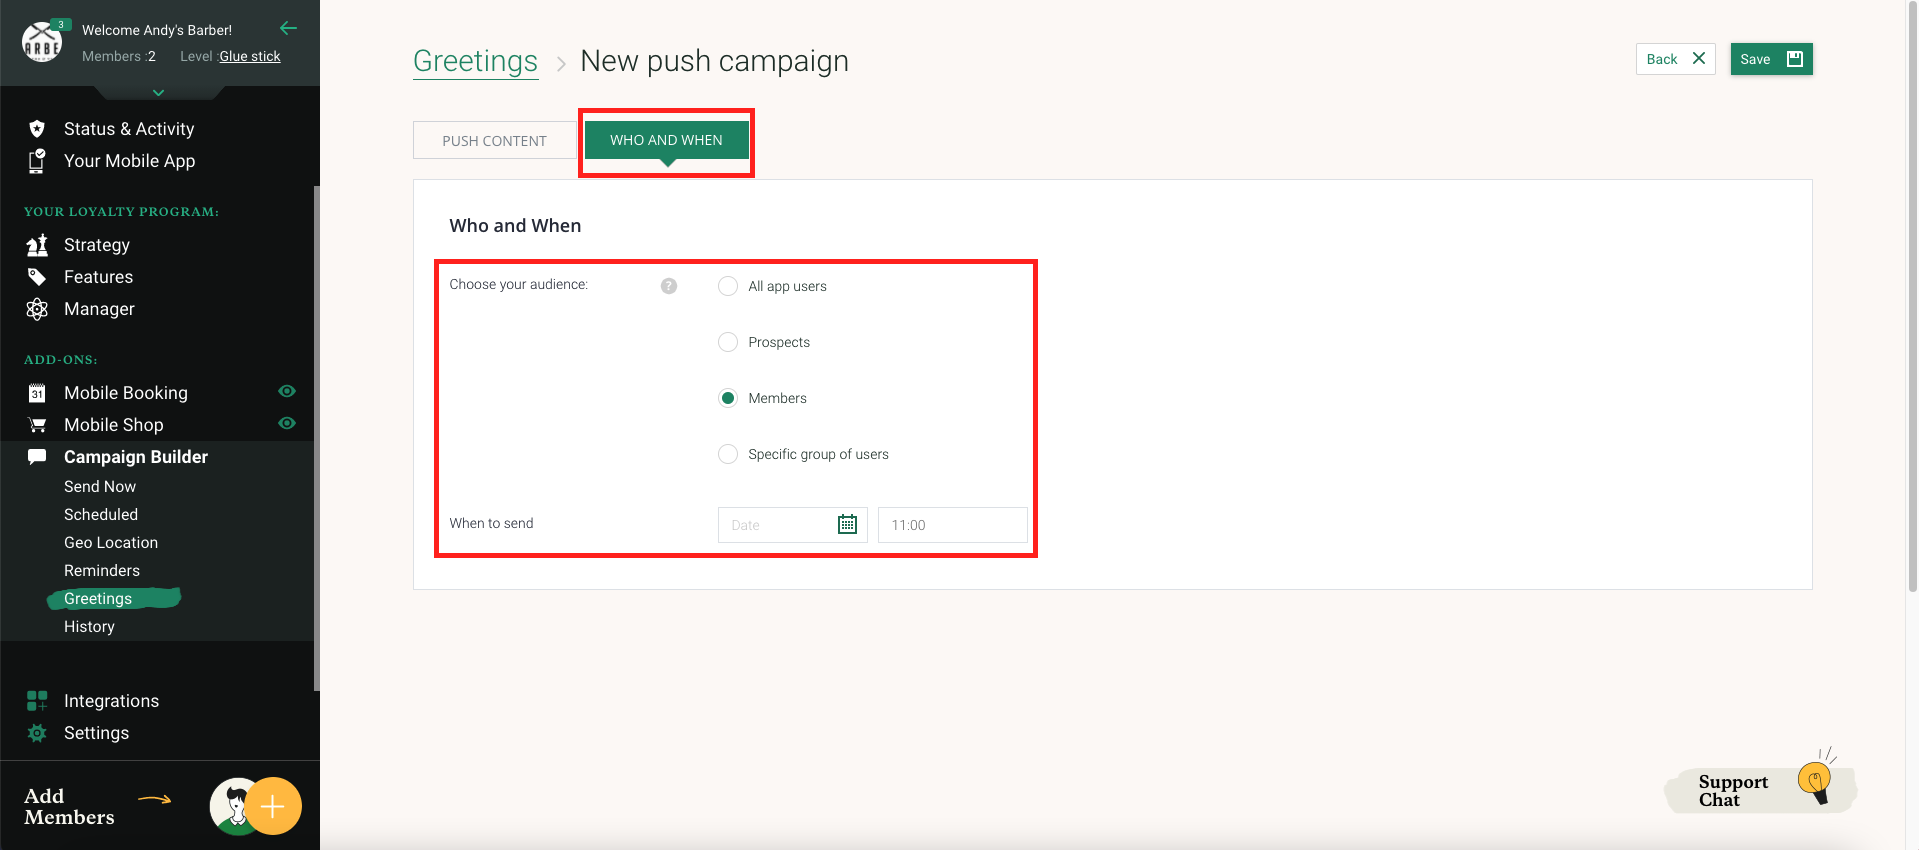
Push Target Audience & Timing – Choose who you want to send this to (all your app users or a specific group of clients).

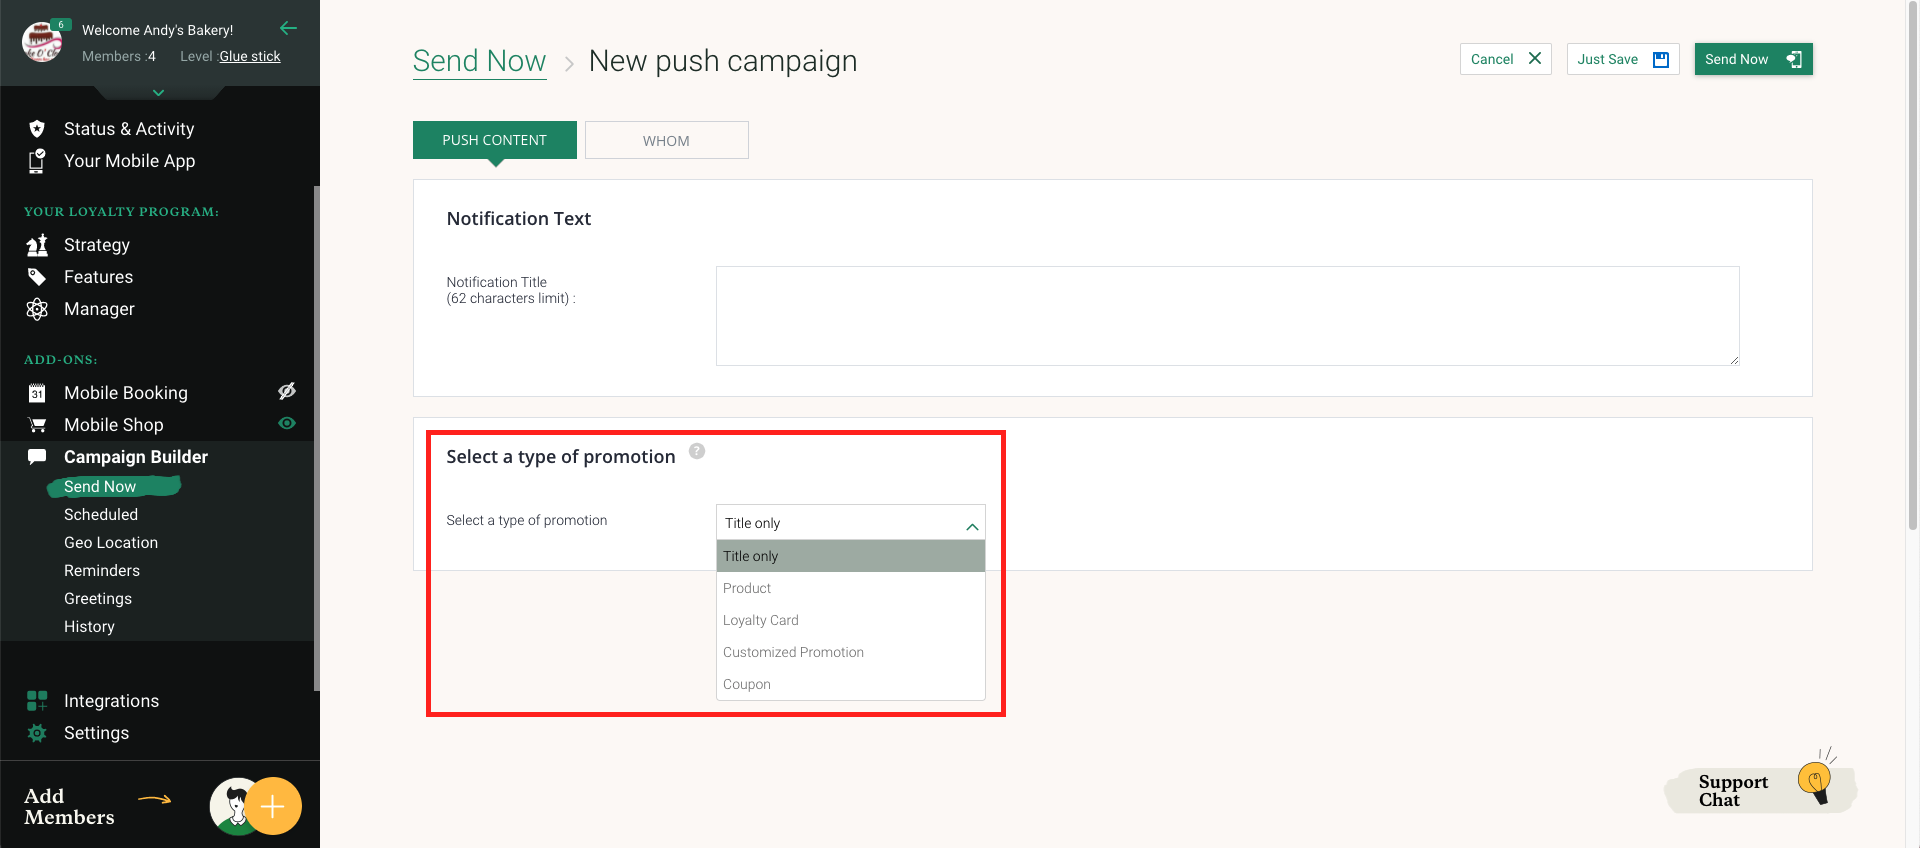
The next step is to customise the push notification.

On the “Type of Promotion” section, choose Loyalty Cards and select the loyalty card you wish to promote. This push message will redirect clients to the Loyalty Card:


Send Now

Send an immediate push message to your clients, or save it for later


To send a push notification simply press on the green circle with the plus icon in it.


Next you will need to type in what you want to say to your members in the ‘Notification Text’ section. You will have a limit of 62 characters.


After you have typed in what you want to say, select what type of promotion it is from the drop down menu below


Once you have completed these you will need to go into the ‘Whom’ Tab and select which audience you want to send your push notification to


To save the push notification for later simply press on the ‘Just Save’ button. If you want to send it straight away press on ‘Send Now’


Scheduled

Send clients updates about your business, announce new products, greet them on holidays, and more. Create push notifications to be sent immediately or scheduled in advance.

Creating scheduled push campaigns is very similar to creating the push campaigns in the ‘Send Now’ section.


To create a Scheduled push campaign you will need to press on the green circle with the plus icon in it.


Next you will need to type in what you want to say to your members in the ‘Notification Text’ section. You will have a limit of 62 characters.


After you have typed in what you want to say, select what type of promotion it is from the drop down menu below


Once you have completed these you will need to go into the ‘Whom’ Tab and select which audience you want to send your push notification to and to select the date and time you want the push campaign to be sent


To schedule the push notification simply press ‘Schedule’ which is located at the top right hand corner


Geo Location

Use the location based push notification to boost your in-store traffic by sending offers, benefits or updates for clients who are located in the desired radius of your business location. By using the “Reset customer’s limitation” button, you will be able to reset “Repeat push campaign” limitations


You can set the distance of how far a customer needs to be from your business for the to receive a push notification. To set this simply click on ‘Active’ and then use the slider to determine how far you want the push notification to be received (minimum of 1km and maximum of 10km)

You will also need to fill in the location details of your company so the system will know where and the radius the push notification is being sent to.


Reminders

Use this feature to remind clients that it’s time to drink water, to schedule a workout, to book their annual checkup, and so on.

To create a reminder simply press on the green circle with a plus icon in it.


Next you will need to put in what you want to say to your customers and whether you want this to be your active reminder or not by turning the ‘Active’ slider on or off.


The next step is choosing the audience that you want to send this to and deciding if you want this reminder to be daily, weekly, monthly or annually and the date of when you want this reminder to start.


Once you have these steps done simply press on the ‘Set Reminder’ button located at the top right hand corner


If you want to stop a reminder or make any changes to any of your reminders then all you need to do is press on the pencil icon beside the reminder and then turn the ‘Active’ slider off (greyed out)


You can also delete any reminders that you don’t want anymore by pressing on the trash can icon located to the right of the reminder


Greetings

Send greetings to your clients on special occasions such as birthday and anniversary and on holidays such as Halloween, Christmas and more.

To create a greeting simply press on the green circle with a plus icon


First you will need to choose whether the greeting is for a special occasion or a holiday and then narrow it down further i.e Birthday, For halloween or Christmas


Next you can select the design of your greeting from the different selection that will appear


After selecting the design you can then edit the Title, greeting and the signature. You will see a preview of how the greeting looks on the right hand side


Once you are done creating your greeting you will then need to go to the ‘Who and When’ tab and select who will receive the greeting and what date and time it is to be sent.


Once you have done all this simply press ‘Save’ to save your Greeting.


History

Here you can see the history of push messages sent by you to your app users.

You can filter through your delivered push campaigns by dates. You can also search for a particular push campaign and you can sort your push campaigns by when they were sent, created or by the push type.

In the History of your push campaigns you will be able to see the push message, push type, who it was to, the date the push was created and the date the push was sent on.


Can’t find what you’re looking for?

You can contact us via email or start a live chat from the bottom right corner, throughout our website.

Helping in finding next step
34.36.148.109